System Users
Overview
The System Users screen is specifically meant for creating web portal accounts for Users to access and manage IntellaConference functions. Similar to the core Intellasoft Users screen, you will have the options for adding individual users and the ability to manage their permissions within the IntellaConference web portal.
Adding a New System User
2) Click the New User button. The table below represents the available settings for creating a new User. The permission options will be covered in a later step. (* Indicates a required field)
| Field |
Type |
Description |
| First Name* | Field | First name of User |
| Last Name* | Field | Last name of User |
| Email* | Field | Email address of the user (for logging in) |
| Phone Number | Phone Number # | User's phone number (direct line, cell phone, etc.) |
| Pin | Numerical | Always recommended; pin number to login into web portal |
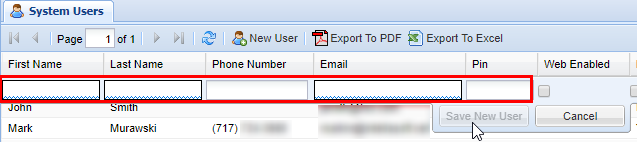
3) Once you have entered the required options, click the Save New User button. You will see a message stating Changes Saved.
Note: The screenshot below is from a demo system so the full phone number and email have been blurred out for privacy reasons.
4) Next, set the permissions for the User in question. The individual permissions are defined in the table below.
5) Once you have set the desired permission for a user click the button labeled Save New User, you will see a message stating Changes Saved, indicating the user has been successfully saved. If you need to edit a User's setting click on the entry from the editor to make changes accordingly.
| Permission |
Description |
| Web Enabled | Check for the user to have access to the web portal (this in the majority of cases should be checked). |
| Manager | Can only edit pre-existing conferences. |
| Admin | Access to all elements of the IntellaConference web portal such as creating contacts, creating and modifying conferences. |
| Access Users | Has access to the users screen and is able to make changes. |
| Create Recur | User has ability to create recurring conference bridges. |

Note: You must have the required settings entered to be able to save, additionally it should also be noted that each user must have their own unique PIN.
Removing a System User
To remove a web portal User click on the red X under the delete column corresponding to the User you wish to delete. A confirmation pop-up will appear confirming that this is the User you wish to delete, click OK. You will see a message stating Changes Saved. 

No comments to display
No comments to display