Hunt Groups
Overview
Hunt Groups contain Hunt Group Members, which are a collection of phones to be dialed until a party is reached. They can be set up to ring a collection of phonephones all at once, or one at a time in a set order.
Adding a Hunt Group
2) Next click the New Hunt Group button.
3) Enter a formname will appear with several options to select from, start by givingfor the Hunt GroupGroup. a name. ThatThe name cannot contain space,spaces, if you wish to seeuse a space use an underscore instead.
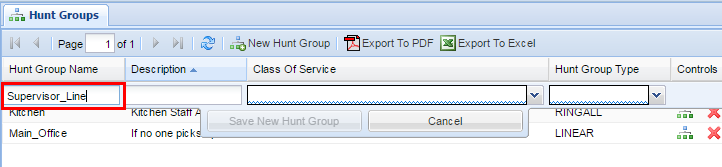

Afterwards chooseEnter a Description for the Hunt Group,Group. theThe description should be brief but can contain spaces.
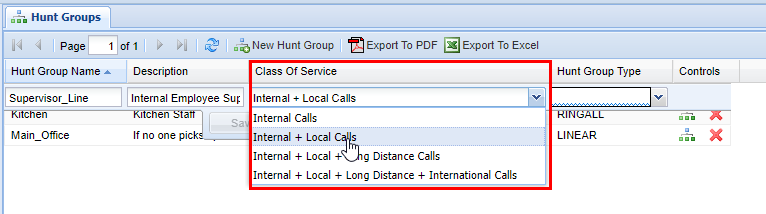
Next5) chooseChoose a Class of Service for the Hunt Group. (clickWhat here foris a explanation of Class of ServiceService?)

Next selectSelect a Hunt Group Type for the Hunt Group. The(See twobelow options available are RINGALL or LINEAR. Forfor an explanation pleaseof seegroup thetypes)
7) After you are finished, click the Save button in the middle if you are satisfied with the Hunt Group you have created.middle.
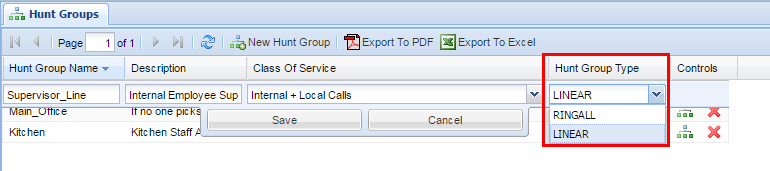

Hunt Group Types
| Hunt Group Type |
Definition |
| RINGALL | ALL members of the Hunt Group will ring simultaneously until the call is picked up. If the call is not picked up it will go to the unavailable destination that is programmed to that Hunt Group on the back end of the web portal |
| LINEAR | The members of the associated Hunt Group will ring in the |
Quick Edit of Hunt Group Members
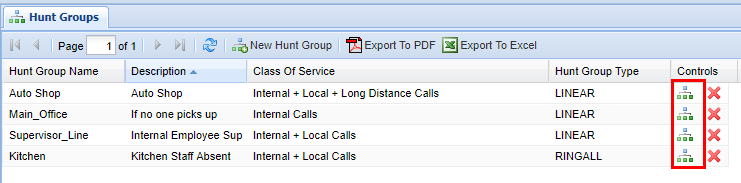
An action column button is available in Hunt Groups to quickly go to the Hunt Group Members screen. To do so, simply click on the button on the right hand side of the Hunt Group you wish to edit.

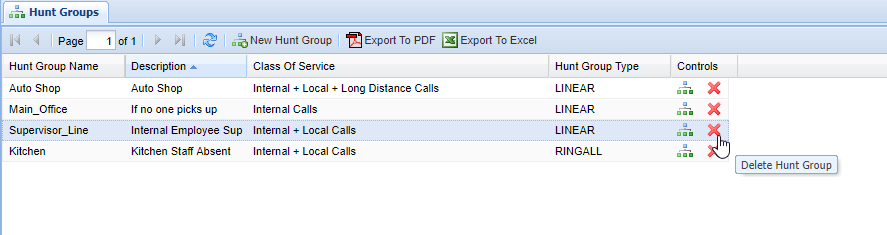
Removing a Hunt Group
2) Find the desired Hunt Group you wish to delete,delete
3) clickClick the red X in the Controls column.
When you are removingremove a Hunt Group Group,it is important to remember you are also deleting the Hunt Group Members alongassociated with it. ItMake is important to ensuresure that this will not interrupt with your organization's call flow. If you have any doubts about this contact your system administrator for questions or instructions.administrator.
4) A confirmation pop pop-up will appear confirming your selection. If you wish to deletedelete, click OKOK. , youYou will see a message stating Changes SavedSaved., ifIf this is not the entry to wish to deletedelete, click Cancel, to return to the screen.