DayNight Schedule
Overview
The DayNight Schedule screen is where you set the actual schedule for the DayNight Groups themselves.. You have the ability tocan set a permanent schedule as well specificas override periods of time where the schedule may need to be modified based on the current needs of your organization.
Group Selection
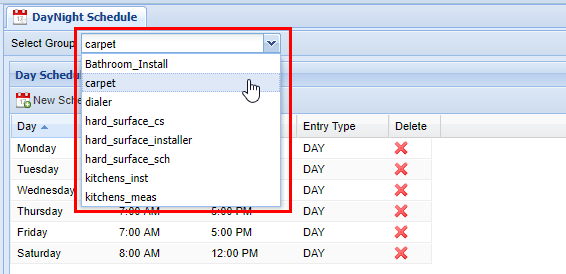
WhenBefore modifying any DayNight Schedule, you aremust modifyingselect a DayNight Schedule groupyou do so by selecting a DayNight Group. Before editing a DayNight Schedule ensure you have a proper group selected by selecting one from the Select Group drop down, which is at the top left hand corner of the DayNight Screen. screen.
Adding a Day Schedule
2) chooseChoose a DayNight Group to modify as(see shown in the Group Selection,)
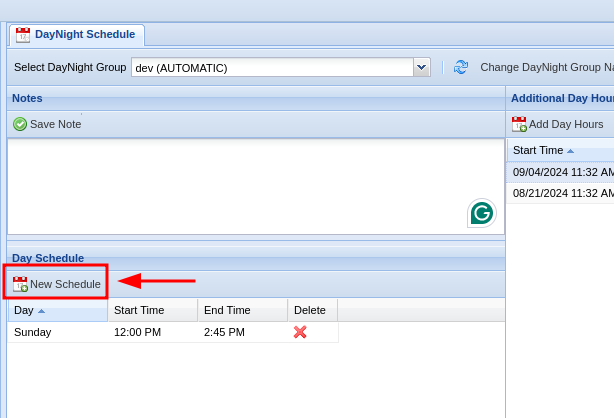
3) To add a Day Schedule start by clicking New Schedule within the Day Schedule tab,tab. alternativelyYou youcan click simplyalso click on a pre-existing day if you are modifying the permanent Day Schedule.
4) A row editor will appear in the grid with several options,.options.
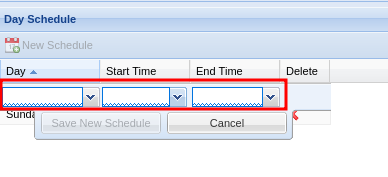
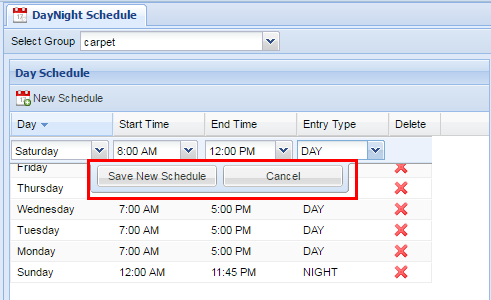
5) selectingSelect the appropriate day (days always range from Sunday through Saturday, each day must be set individually). After you select a day enter an appropriate, start time and end time (the times are specific to AM and PM). Lastly select an appropriate Entry Type (Day or Night) to determine how the DayNight Group will behave when it's within start timetime, and end time. All of the options are contained with drop down menu in each of their respective columns.
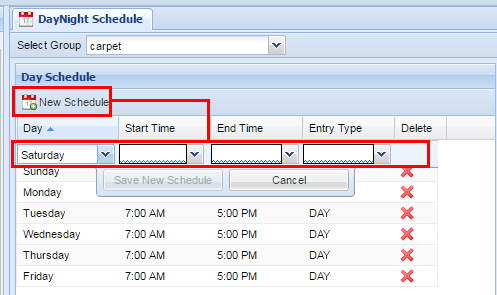
After you are satisfiedfinished with your selection,editing, click Save New Schedule. If the changes have been saved successfully you will see a green message at the saying Changes Saved. Repeat the previous steps to add additional days.
Removing a Day Schedule
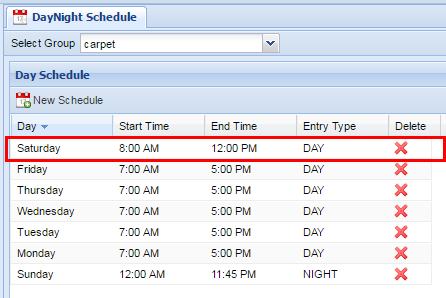
2) you are in the DayNight Schedule screen start by findingFind the correct date to remove, and click on the red X under the Delete column.
3) A confirmation pop pop-up will appear confirming your selection.appear. If you wish to deletedelete, click OKOK. , youYou will see a message stating Changes SavedSaved. , ifIf this is not the entry to wish to delete click Cancel, to return to the screen..
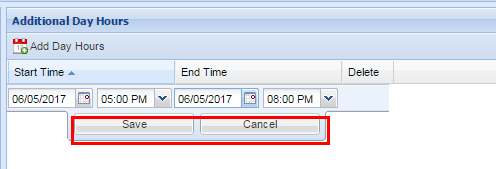
Adding Additional Day Hours
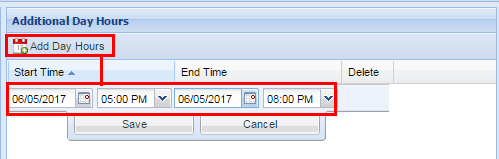
2) Find the Additional Day Hours panel located in the middle of the screen.
3) Click "Add Day Hours" and fill out the start date and time, and the end date and time.
If you need to have multiple days of additional hours at specific times (versus all day) you will need to make multiple entries, one for each day.
4) Click "Save" to add the entry.
Adding Additional NightHours
Adding Additional Night Hours is performed the same way as adding Additional Day Hours except that you willuse the AddAdditional Night Hours, aspanel.

2) Find the Additional Night Hours panel located on the right of the screen.
3) Click "Add Night Hours" and fill out the start date and time, and the end date and time.
If you need to have multiple days of additional hours at specific times (versus all day) you will need to make multiple entries, one for each day.
4) Click "Save" to add the entry.
Example
Let's say we have a permanent day schedule of Monday through Friday 7:00 AM to 5:00 PM. An event is coming up requiring the selected DayNight Group to stay overextra on Wednesday and Thursday for 2 hours, from 5:00 PM to 7:00PM. To accomplish this you will have to make two individualentries, entriesone for each date. The reason for this is if you set a start time for additional hours of Wednesday at 5:00 PM through Thursday at 7:00 PM the entire range of defined hours will indicate that the DayNight Group is in Day Mode. If the phones are configured to receive calls in Day Mode they can potentially receive calls during hours that were not intended to be received (e.g. between 7:00 PM through 7:00 AM the next morning)
After you have ensured that have selected the correct range of hours, click Save Day Override.Save. If the changes are successful a message will appear at the top stating Changes Saved.
AddingRemoving Additional Day or Night Hours
Additional2) Day Hours are defined by a range of both a start date and start time as well as end date and end time. Start by selecting a start date forFind the Additional Day Hours, afterwards select a start time. Start and end times run off a AM and PM schedule (not a 24 hour clock). Afterwards select an appropriate end date, as well ass end time. If you need to have multiple days of additional hours at specific times you will need to make multiple entries for each day.

Removing Additional Day or Night Hours


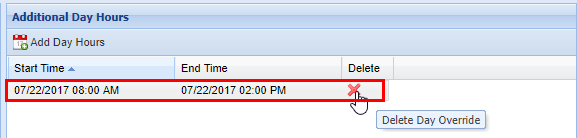
3) From the Additional Day Hours or Additional Night Hours tabpanel click the red X in the Delete column.
4) A confirmation pop pop-up will appear confirming your selection. If you wish to deletedelete, click OKOK., youYou will see a message stating Changes SavedSaved. , ifIf this is not the entry to wish to deletedelete, click Cancel, .to return to the screen.