| [](#bkmrk-navigation) | [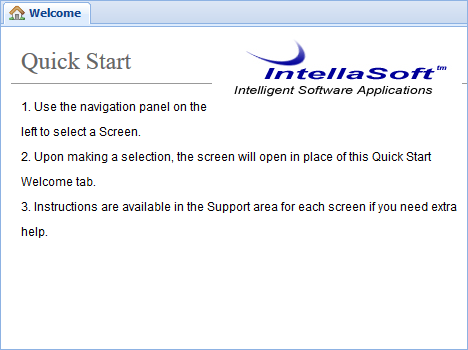](#bkmrk-screen-content-area) |
| Top bar | The account management bar along the top of the window is used to change your password or logout. |
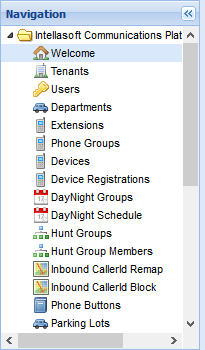
| Left panel | The navigation panel at the left of the screen is for navigating to different screens within the web portal. |
| Right panel | The content area, filling the majority of the window, will display information and tools based on the selected screen. |