# Agent Assignments
## Overview
The **Agent Assignments** screen is dedicated to assigning Agents to specific Queues. There are two different modes to consider when using this screen. **Queue Select Mode** and **Agent Select Mode**, which you can access via a button at the top left hand of the **Agent Assignments** screen as pictured below.
**In Agent Selection Mode:**
[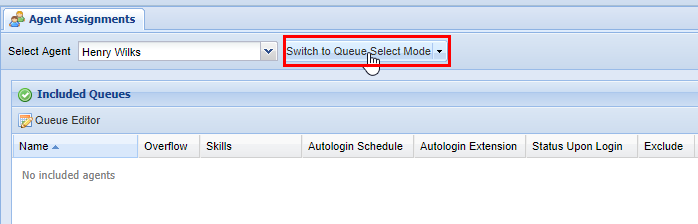](https://public.intellasoft.net/uploads/images/gallery/2024-07/aHtimage.png)
**In Queue Selection Mode:**
[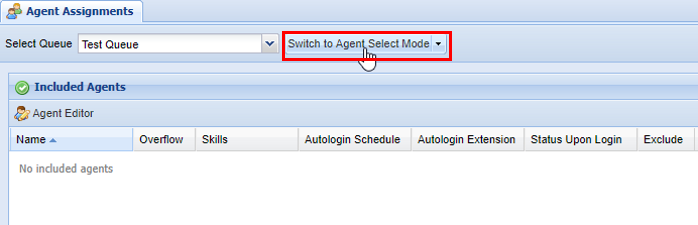](https://public.intellasoft.net/uploads/images/gallery/2024-07/BEuimage.png)
Regardless of which mode you are in, it is important to ensure that you have the correct Agent or Queue selected before making changes. This can be accessed from the drop-down at the top right-hand of the screen to the left on the mode selection button. In the example below, we are selecting a Queue to add Agents to while in **Queue Selection Mode.** It works vice versa if you are in **Agent Selection Mode** (you are selecting an Agent to add Queues to).
[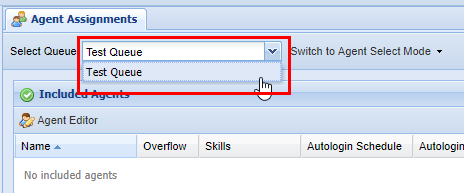](https://public.intellasoft.net/uploads/images/gallery/2024-07/hFGimage.png)
## Configuring Agents while in Queue Selection Mode
1\) Start by navigating to the **Agent Assignments** screen via the **Navigation Panel.**
2) Then ensure you have selected the correct mode and the proper Queue from the drop-down.
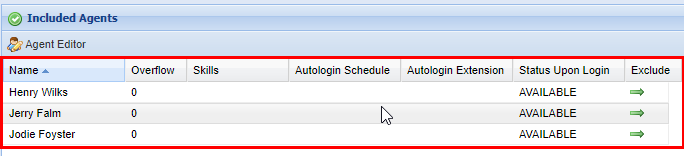
3) To add Agents, click the green arrows under the **Include** column for each Agent you wish to add. As you include each Agent, they will be moved to the **Included Agents** panel.
[](https://public.intellasoft.net/uploads/images/gallery/2024-07/9KMimage.png)
[](https://public.intellasoft.net/uploads/images/gallery/2024-07/aKGimage.png)
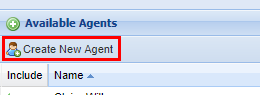
If you need to add additional agents, you can click the **Create New Agent** button above the **Available Agents** panel. This will immediately take you to the **[Agent Editor](https://public.intellasoft.net/books/intellaqueue-nQF/page/agent-editor)** screen.
[](https://public.intellasoft.net/uploads/images/gallery/2024-07/Jikimage.png)
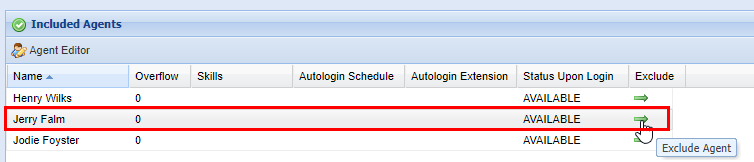
4\) To remove Agents from a Queue click the green arrows under the **Exclude** column from the **Included Agents** panel for each Agent you wish to exclude.
[](https://public.intellasoft.net/uploads/images/gallery/2024-07/xw3image.png)
## Configuring Agents while in Agent Selection Mode
1\) Start by navigating to the **Agent Assignments** screen via the **Navigation Panel.**
2\) Ensure you selected the correct **mode** and the proper Agent from the drop-down.
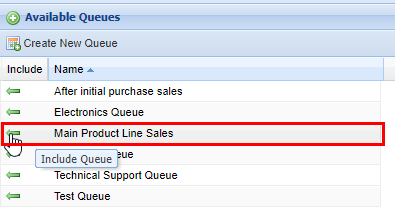
3\) To add Queues to the agent, click the green arrows under the **Include** column for each Queue you wish to add (see the image below). As you include each Queue, they will be moved to the **Included Queues** panel.
[](https://public.intellasoft.net/uploads/images/gallery/2024-07/VTXimage.png)
[](https://public.intellasoft.net/uploads/images/gallery/2024-07/ayDimage.png)
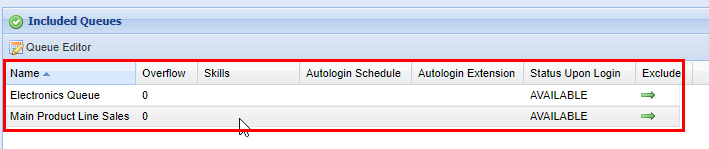
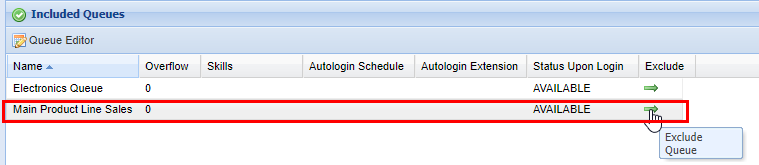
4\) To exclude Queues from an Agent, click the green arrows under the **Exclude** column from the **Included Queue** panel for each Queue you wish to exclude.
[](https://public.intellasoft.net/uploads/images/gallery/2024-07/LgNimage.png)