3rd Party Hardware/Software
- Overview
- Linphone - Users Guide
- Polycom VVX Cheat Sheet
- Emacs
- Bogen Paging - Wiring Setup
- Apple Mac -- Remote Desktop 10
- OpenVPN Installation - Windows 7 and Windows 10
- MicroSIP
- Zoiper Configuration
- Linphone 4.X
- Linphone - Installation Guide
- Linphone - Installation Guide - Secure-SBC
- Linphone Mobile - Installation Guide
- Polycom 331/350 Cheatsheet
- Polycom VVX Video Tutorials
- Linphone Mobile - Users Guide
- Polycom 331/335/VVX Video Tutorials
- Troubleshooting
- How-to Articles
Overview
In this book, you will find relevant information on utilizing third-party software and hardware that are not IntellaSoft products but are installed as part of your overall IntellaSoft Communications Platform. You can find quick references specific to your devices such as the Polycom VVX as well soft-phones such as Linphone - Users Guide.
You may also find information specific to setting up other physical components such as Edge Routers, Wireless Access Points, among other devices. If you run into technical difficulties that you are not able to resolve through this documentation be sure to check out our ticket system for submitting a help desk ticket.
What's Included in This Space
- Linphone 4.X - Installation Guide: Step-by-step documentation covering the installation of Linphone Soft Phone
- Linphone 4.X - Users Guide: Step-by-step documentation covering the basic functions of the Linphone Soft Phone
- Polycom VVX Cheat Sheet: A quick reference to some of the basic functions of the Polycom VVX 400/401 SIP Phone. There are three separate tables that correlate to a user's role within the organization (Standard, Agent, and Supervisor)
- Polycom VVX Video Tutorials: In-depth video tutorials on how to use some of the basic functions of the Polycom VVX 400/401 SIP Phone. Such functions include transferring, placing calls, conference mode etc.
- Polycom 331/350 Cheat Sheet: A quick reference to some of the basic functions of the Polycom 331/351 SIP Phone, there are three separate tables that correlate to a user's role within the organization (Standard, Agent, and Supervisor)
- Polycom 331/335/VVX Video Tutorials: In depth video tutorials on how to use some of the basic functions of the Polycom 331/351 SIP Phone. Such functions include transferring, placing calls, conference mode etc.
- Upgrading to Microsoft Remote Desktop 10 for Mac Users
- Using Emacs text editor for internal system maintenance
-
Troubleshooting: coming soon...
Linphone - Users Guide
Overview
Note: This guide assumes you already have Linphone 4.0 installed and can launch it successfully.
Making a Call
1) Start by clicking the box at the top of the application, we call this the 'Dial' box

Type the contact number you are calling or if you already have a contact in your list, click the contact's name.
3) Finally, click the call button located in the middle of the three buttons to start dialing. 
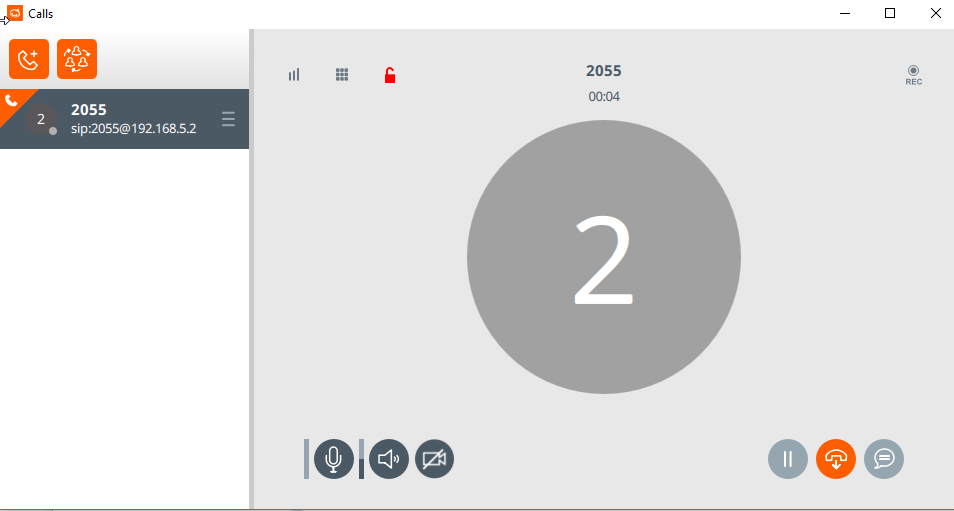
Here is what a connected call looks like.

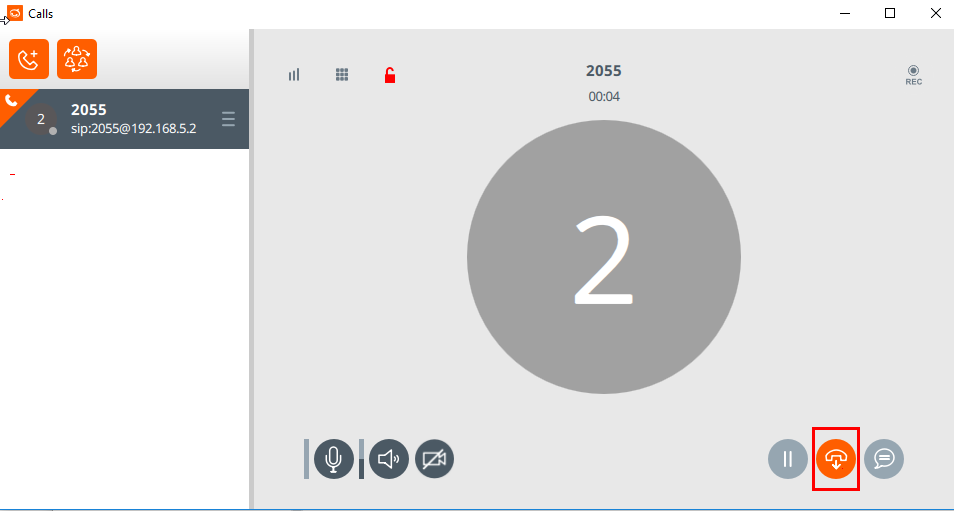
Ending a call
Press the middle 'hangup' button at the bottom right corner.

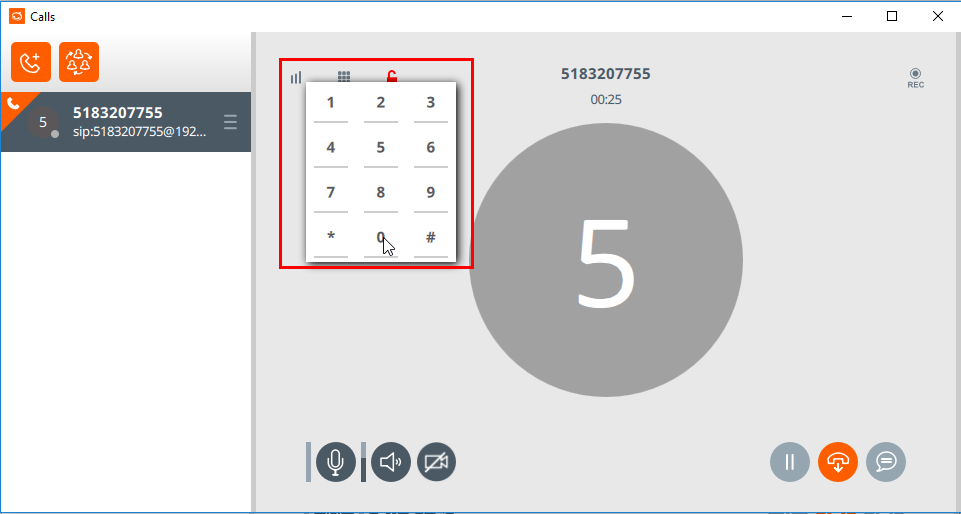
Using the Number-Pad
1) Click on the square dots icon in the top-left of the call

2) From here you can enter the number to be called.

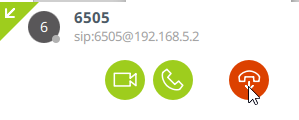
Receiving a Call
When receiving a call, you will see a notification at the bottom right-hand side of the screen. Press the middle button to accept the call.

Or click the right-most button to reject the call.

Conference Calls
Below are a couple of examples for initiating a conference call.
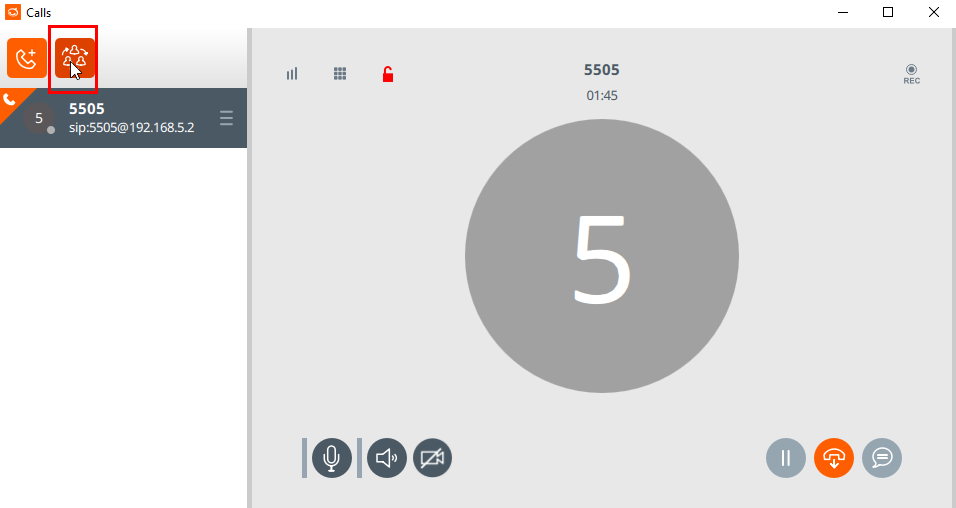
While on a Call
1) If you are already on a call, press the right-hand button under the 'Calls' section. 
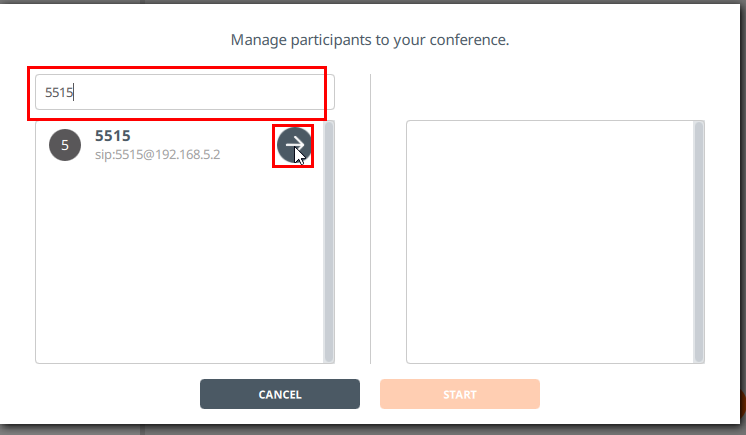
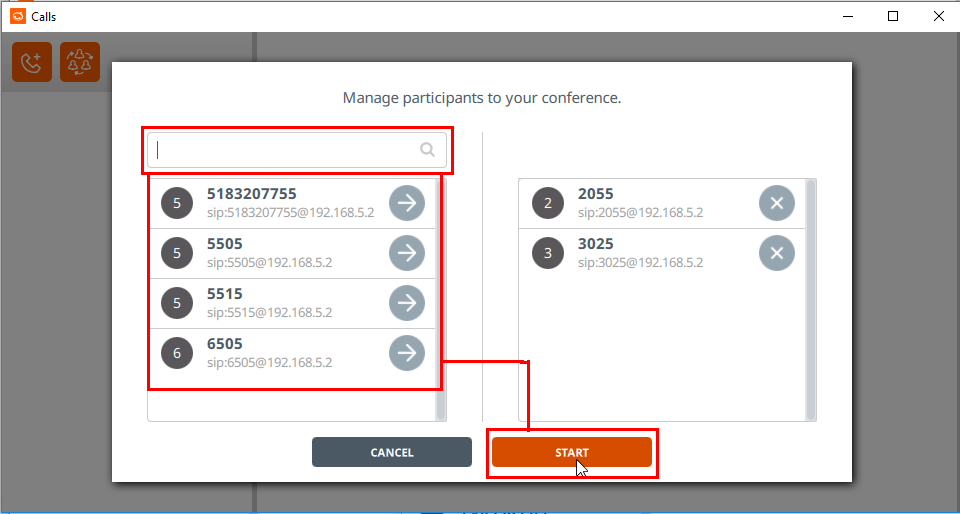
2) From here, you can select or type the contacts/numbers you want to invite to join. For Example: Co-worker at extension 5515 needs to join this call.
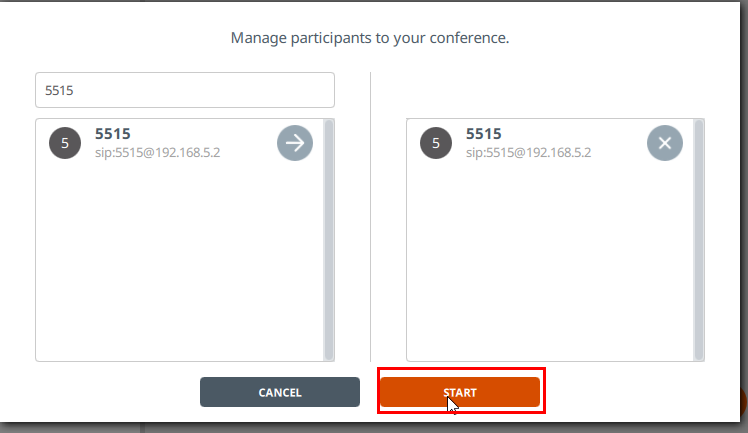
3) When done entering the number to be called, click 'start',
4) The number dialed will now ring.
5) Once the dialed party picks up, they will be on the call with you AND the original party that was on the line. 
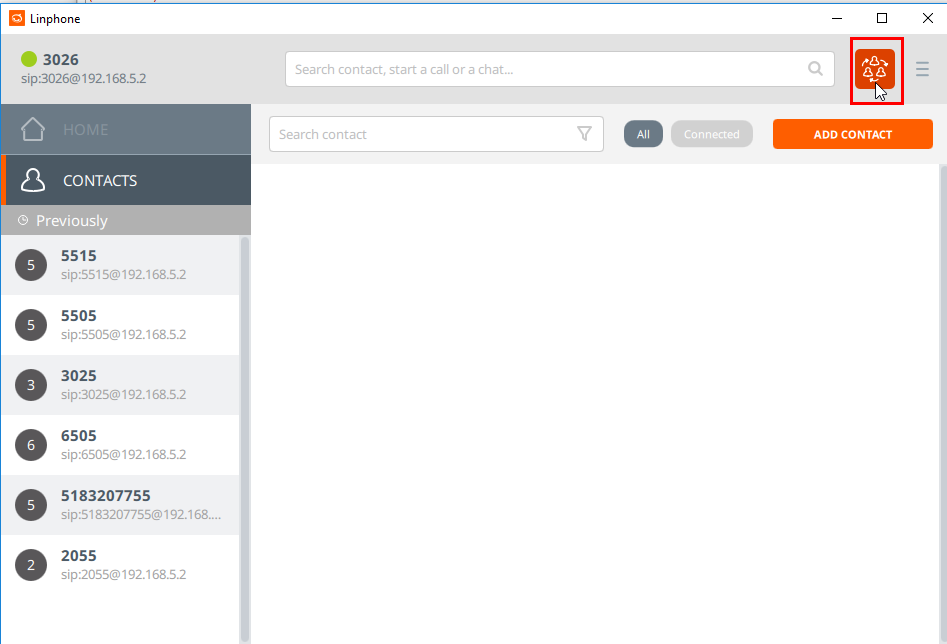
While not on a call
1) If there are no calls in progress, click the conference icon on the top right as shown here.

2) Select contacts from the list or type in extensions/phone numbers to call
3) When done, click 'Start'
4) All parties who answer the call will be added to the conference.

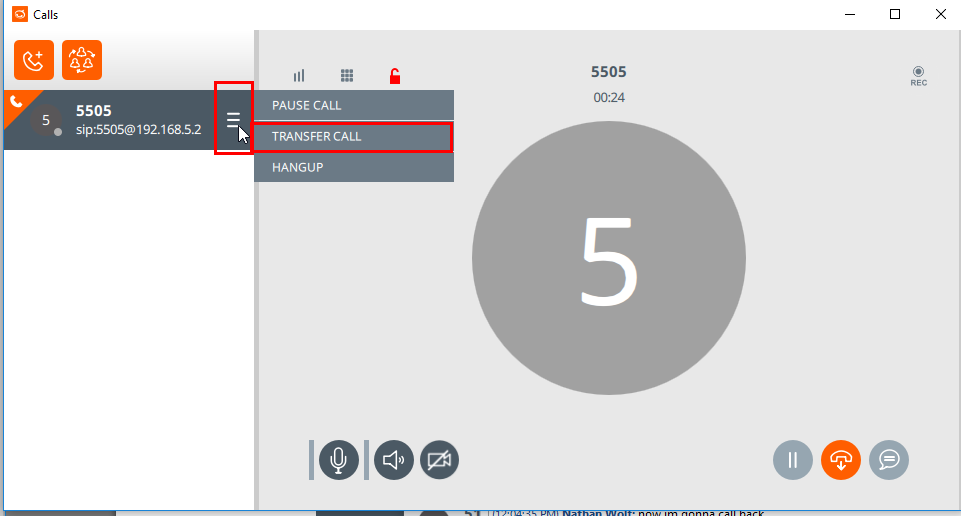
Transferring Calls
Currently, the only option is a 'blind transfer': when a transfer completes, the call will disconnect, and the original party will now be talking to whom it was transferred to.
1) Start by clicking the 'Triple Bar' button on the right-hand side under 'Calls'.

3) From here you can find the contact you wish them to transfer to.
Or, enter the extension or phone number of the intended transfer
4) Upon clicking the 'Transfer Arrow', your call will disconnect and will be sent to the new party

Polycom VVX Cheat Sheet
Overview
This page includes some of the most commonly used functions of the Polycom VVX SIP phone (may also be called the VX400 or VX401). Each of the tables represents a set of functions that will be available to you depending on your role within your organization as explained below:
- General Phone Functions - Applies to anyone who is using a Polycom VVX400/401 phone.
- Extended Agent Functions - Applies to those running a call center Intellasoft setup. These functions are specific to Agents. The General Phone Functions also apply.
- Extended Supervisor Functions - Applies to those running a call center Intellasoft setup. These functions are specific to those in a Supervisory role. The Extended Agent Functions and General Phone Functions also apply.
General Phone Functions
| Action |
Instruction |
| Dial | Dial (optional) 9 – 911 |
| Outside Calls - Local | Dial (optional) 9 + (7) Digit Local Number |
| Outside Calls – Long Distance | Dial (optional) 9 + (10) Digit Long Distance Number |
|
Call Hold Retrieval |
Phone One: Place Call on Hold |
| Transfer Call |
|
| Transfer Call To Voicemail |
|
| Conference Call – Method 1 |
|
| Conference Call – Method 2 |
You may need to press the More button to see this option |
| Conference Call – Split Calls |
Individual calls will be split to different Line buttons |
|
Voicemail |
You may need to press the More button to see this option
If this is your first time setting up your mailbox |
|
Voicemail |
If this is your first time setting up your mailbox |
|
Arrow Up |
|
Extended Agent Functions
|
Action |
Instruction |
|
Agent Login |
|
|
Agent Pause |
|
|
Agent Logoff |
|
Extended Supervisor Functions
|
Agent |
Action |
|
Voicemail (Access from your extension) |
|
|
Voicemail (Access from other extensions) |
|
|
Call Center Station Monitor |
|
|
Day / Night |
|
Emacs
Before you Start!
An important key sequence is C-g (Control-g). You'll see why you need this in a moment.
In Emacs lingo, C followed by a dash, followed by a letter (Example: C-x) means Control (Crtl Key) followed by that sequence, in this case, 'x'
For example: C-c would mean control-c to be held down at the same time (like a copy operation in Windows). Don't let go of the Control key before hitting 'c'.
Another Example: Multiple Sequences: C-x C-c, would mean, Control-x followed by Control-c. This sequence will exit emacs.
Another Example: Multiple Sequences: C-x s, would mean Control-x followed by just the letter 's'. This sequence will perform a save.
Also in Emacs lingo, we have the Meta key. (On most systems this is the 'Alt' key on your keyboard. If the 'Alt' key is not working. substitute this with your 'ESC' key)
For example: M-x would mean Alt-x in the same way that you could use a Control-key sequence.
- Hold down 'Alt' followed by 'x' and then release both buttons
If your system is not accepting Alt-x as a keyboard input for Emacs, 'ESC' can be used in the same way.
- Hold down 'ESC' while hitting 'x' and then release both commands
M-x is known as command mode. You can type built-in commands here like: 'search-forward' which will start a text search of the file you are currently using.
Note: there is normally a keyboard shortcut associated with these commands. For example, search-forward is C-s (Control-s)
If you are 'stuck' in some command, or 'stuck' in command mode. Use C-g (Control-g) to get out!
Buffers: Basic
A 'Buffer' is basically a file you can edit
Quit: C-x C-c
Save File: C-x s
Search-forward: C-s
Search-backward: C-r
Start-of-file: M - > (Meta Shift >)
End-of-file: M - < (Meta Shift <)
Buffers: Split-Screen
Split screen horizontally: C-x 2 -- This will split the buffer into two screens the first time you run it
Split screen vertically: C-x 3
Switch to other splits: C-x o -- This will switch between the top and bottom if you have one split. Or loop through all splits if you have more than that
Close split: C-x 1 -- This will close the split, but not close the file! The file is still open! See 'Swap buffers' below
Buffers: Advanced
When opening multiple files, you need a way to switch between them. After an 'Open file' operation, the screen will switch to this new file. Use 'Swap buffers' to get back to the original file
Open file: C-x C-f
Swap buffers: C-x b
Open buffer list: C-x C-b -- Use this to see all the files you have open. Once the buffer list is shown, use 'Switch splits' to switch to the buffer list, and then hit enter on the buffer you want to switch to.
Rectangle operations
Copy rectangle: C-x r M-w
Cut rectangle: C-x r k
Paste rectangle: C-x r y
Offset rectangle with whitespace: C-x r o
Replace rectangle with whitespace: C-x r c
Macro stuff
Define macro: C-x ( <macro> C-x )
Run macro: C-x e
Run command 20 times: M 2 0
Repeat macro for each line: (Select region to operate on) M apply-macro-to-region-lines
Bogen Paging - Wiring Setup
This guide will walk you through the wiring setup for your Bogen Paging System
Step-by-step guide
Note: Click any image to see it larger.
- Unbox and wall-mount the equipment.
Recommendation: Mount the included Polycom Phone within 12 inches of the Paging Amplifier
-
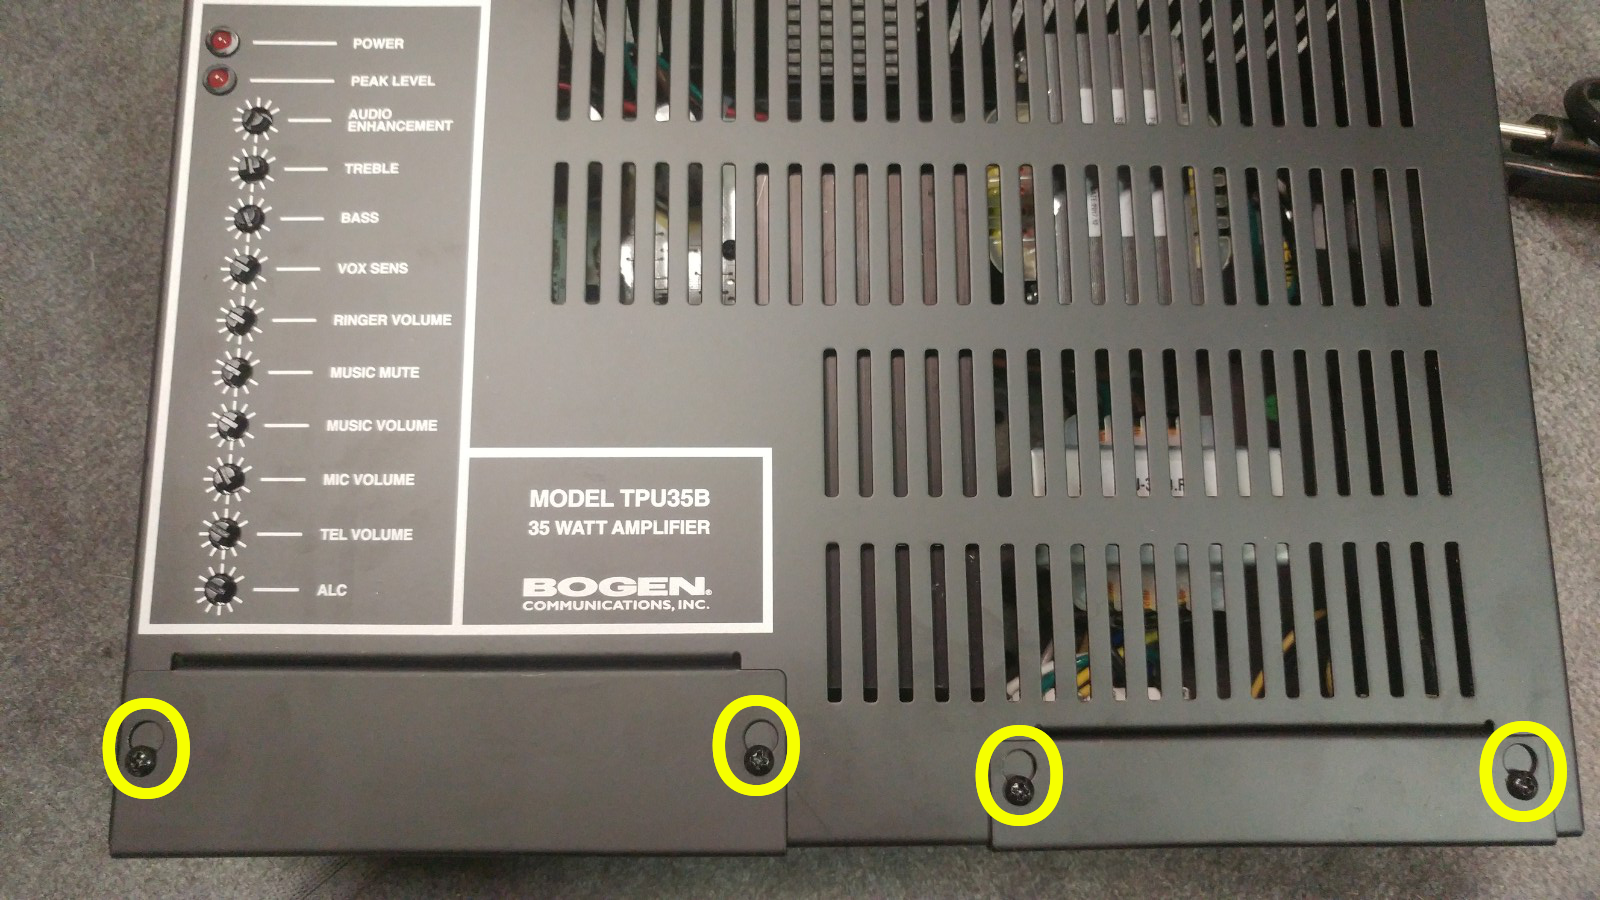
Loosen (but don't remove) the four screws holding down the wiring terminal cover-plates as shown. These plates should now be removable. Keep these plates for completing the installation and re-covering the wiring terminals when wiring and testing are complete.

-
You may have received a 'test wire' with your package. If your test wire is a Category 5 type wire (Standard Network/Ethernet wire), you'll notice the Brown/Orange pairs are twisted together, and the Blue/Green pairs are twisted together. Leave these pairs twisted. This is done to make an equivalent of a 12 gauge wire to safely carry the 70-volt speaker signal. If your package did not come with speaker wire, use this as a guide to make your own speaker wire using standard Category 5 Networking wire.

-
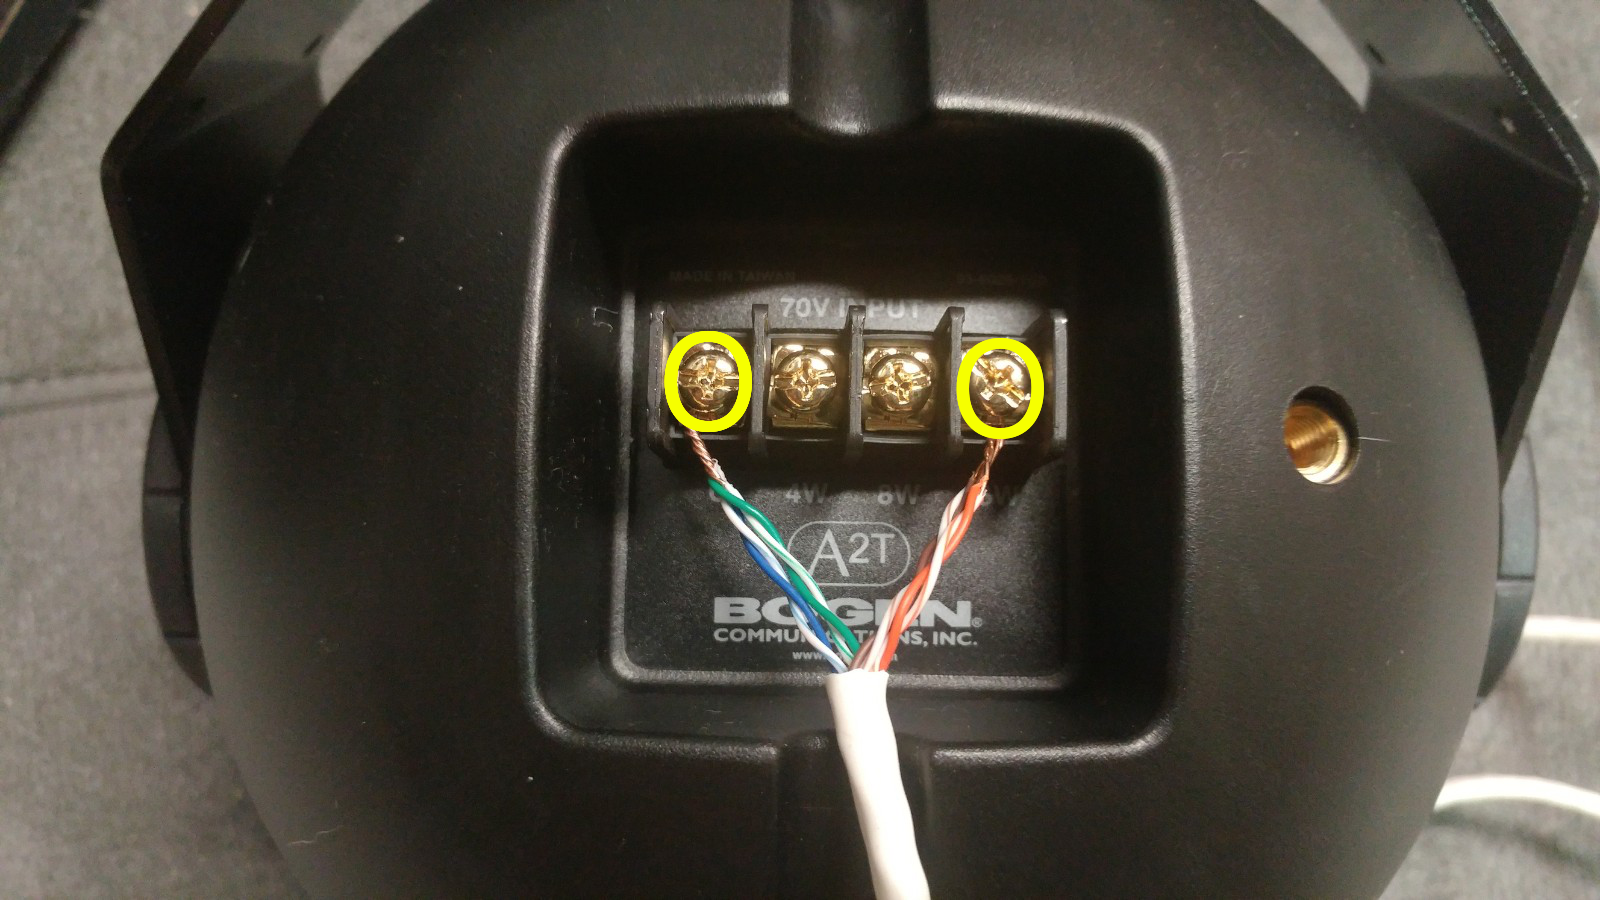
Use the 'test wire' to connect the amplifier to one of the speakers as shown below. Note which color combinations are connected to 70v and which are connected to COM. You will need to make the same connections on the speaker side. After testing, and for the final speaker wire installation, you will use these same connections as shown below.
If you are using more than one speaker, you can connect all sets of speaker wires to the same terminals, which will connect your speakers in parallel. If you are unable to fit all the speaker connections on one terminal, which will be the case when using more than two or three speakers, you will connect your speakers in parallel with the Speaker Hub.
Make all wire connections to and from the amplifier with the POWER OFF.
Also, Unless otherwise noted, your paging system is a 70 Volt System. Do not make any connections to 16 ohm, 25V, 25VCT, or GND otherwise the equipment may become damaged. Damaged equipment caused by incorrect wiring is not covered under any warranty or service plan. If you have any questions or concerns, please contact your vendor for technical support.
-
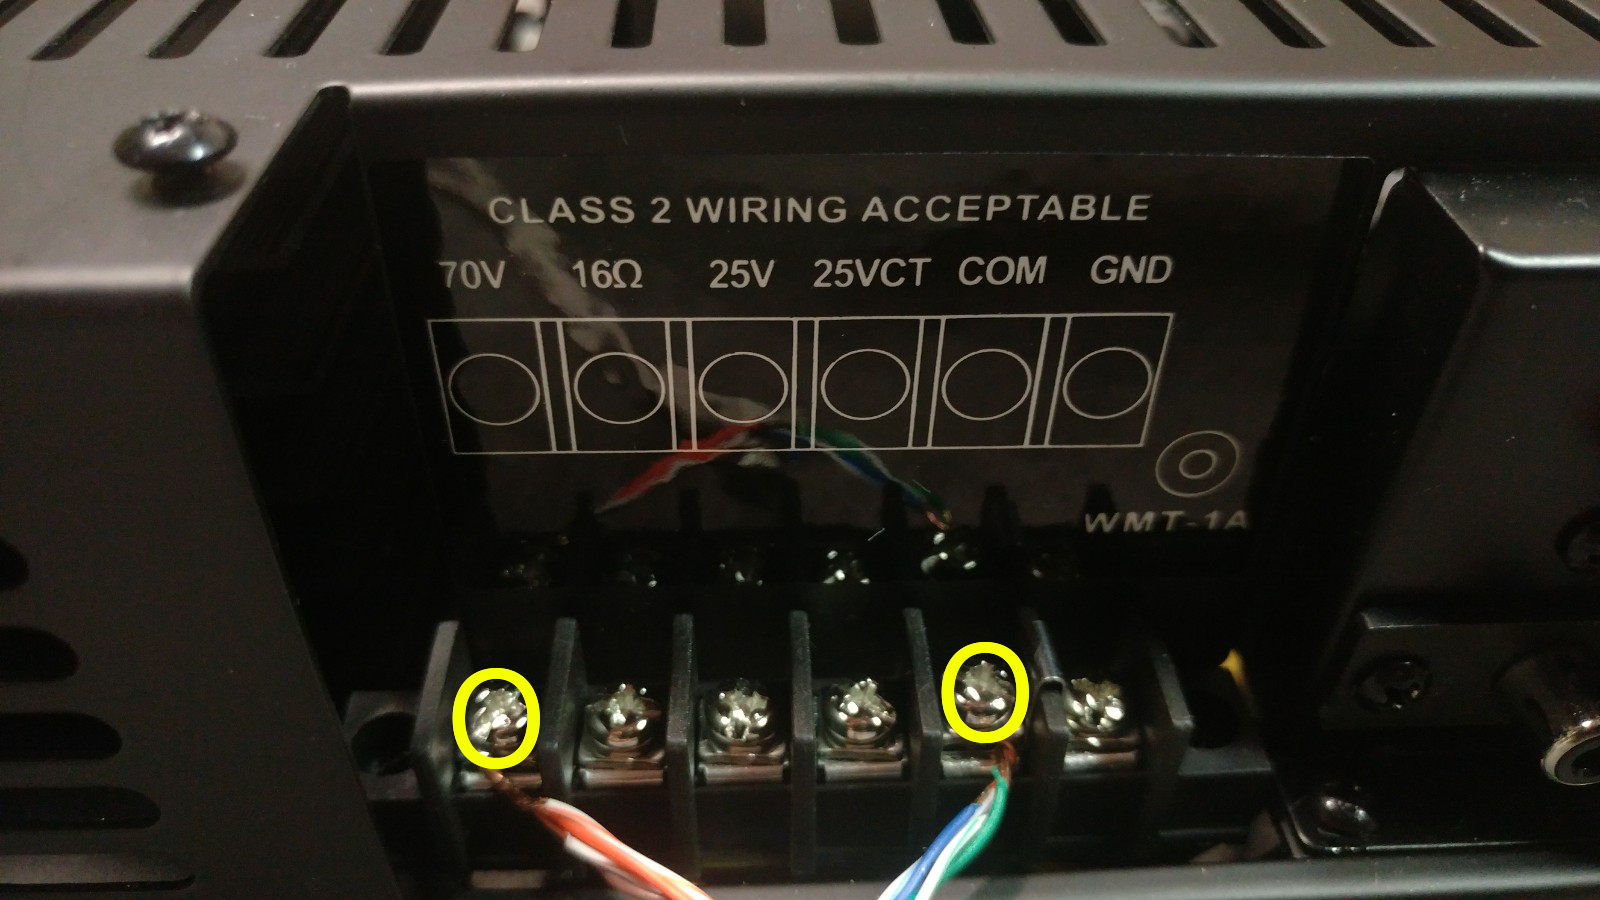
Use the 'test wire' to connect to the speaker as shown. Your specific terminals may be different than the ones shown here, depending on what speakers are part of your package. The important part is to match the total power draw with the maximum power output of your amplifier. In this example, we are using a 35-watt amplifier. If using Cat5 wire, use the Blue/Green pair to connect to COM. If you are using standard speaker wire, use the negative (black or non-stripe) wire to connect to COM. If you are connecting one single speaker, use the 16W terminal to make your connection from the amplifier's 70V output as shown. If you are using two speakers with a 35-watt amplifier, to ensure longevity of the equipment, use the 8W terminals.
When connecting multiple speakers to your system for better coverage of your facility, note the maximum power load that will be put on the amplifier.
When making a connection to a 16-watt tap, this will use 16 watts of power from the amplifier. You will see the maximum power load listed on the body of the amplifier. Depending on the model, your amplifier may be 35 watt, 60 watt, 100 watt, or 250 watt.
If for example, your package is a four-speaker and 35-watt amplifier system, you CANNOT use the 16-watt tap on all four speakers (Because [16 x 4 = 64] and this is greater than the MAX of 35).
You CAN however use the 4-watt tap on all four speakers (Because [4 x 4 = 16] which is a comfortable 47% of the max),
Or, you can have one speaker use an 8-watt tap, and the others can all use the 4-watt tap. The total watts of all speaker connections cannot exceed the maximum power load of the amplifier, otherwise serious equipment damage will occur. The absolute maximum for speaker load is 90% of the amplifier rating. Ideally, you don't want to be higher than 80% of the amplifier rating to ensure the highest reliability of your equipment. -
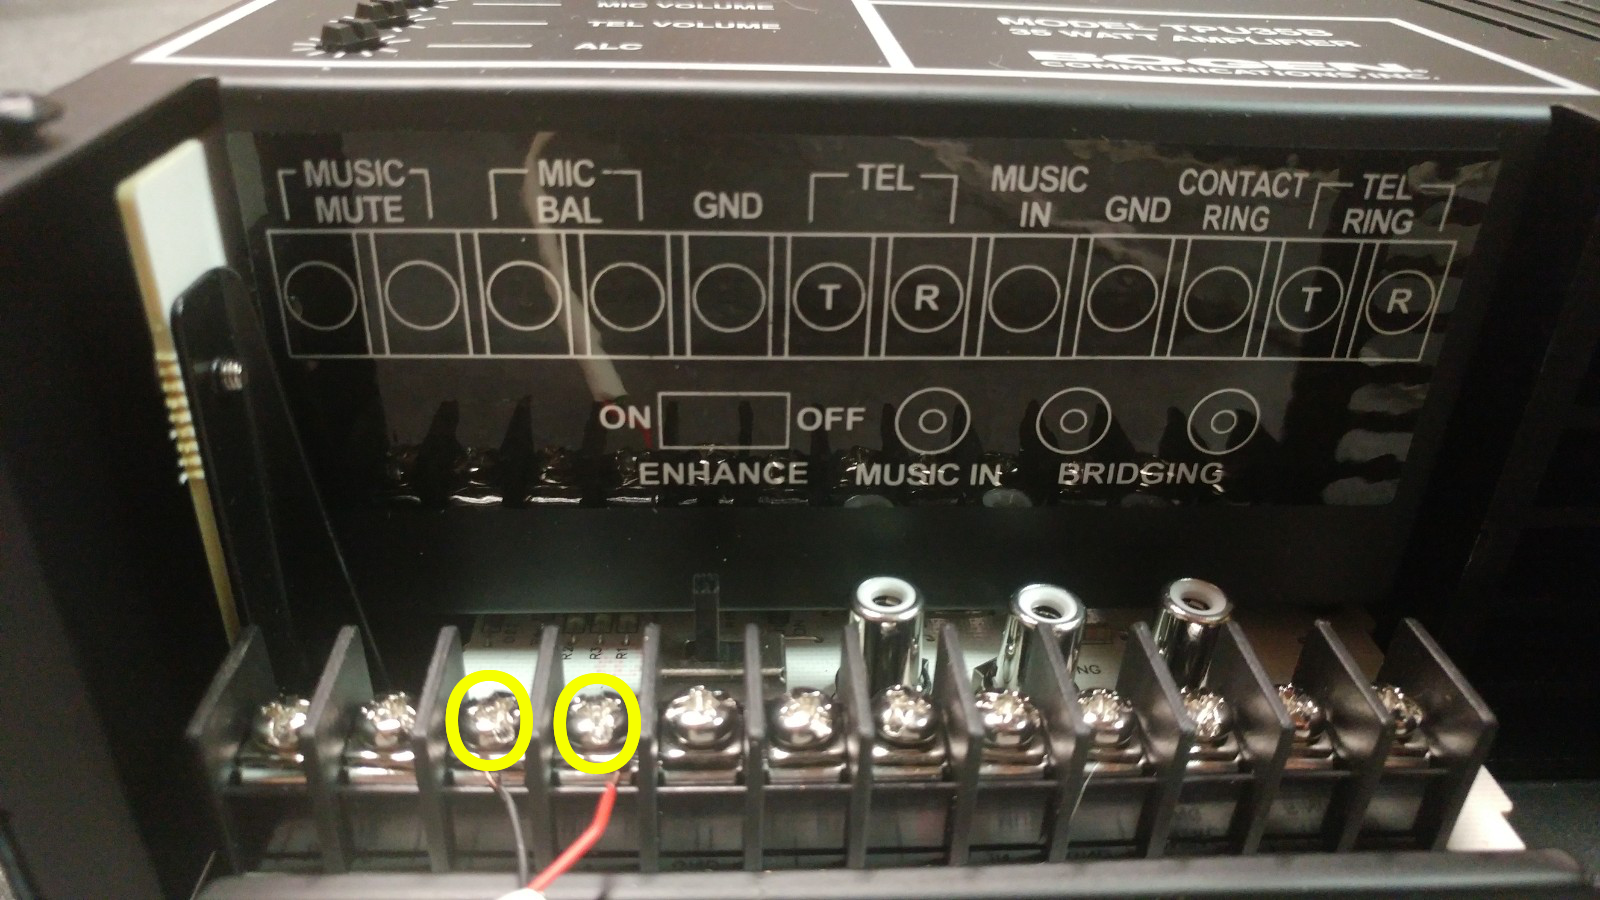
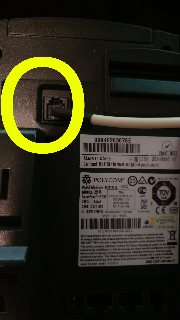
Connect the mic inputs with the included Polycom to Bogen cable. Use the guide below for making the connection to the amplifier. Your type and color of cable may vary. Connect the red or positive side to the right-hand terminal for MIC. Connect the black or negative side to the left-hand terminal for MIC.
-
Connect the rj22 jack to the back of the Polycom phone, to the 'Headset' port as shown.

- Plug the Polycom phone into a network port or directly into the network switch. If your Polycom phone did not come with a power adapter, the power will be provided by the network switch.
- Test the volume of the speaker by either dialing your paging extension or calling the extension of the paging phone directly. Make sure the phone is in headset mode when testing the speaker volume.
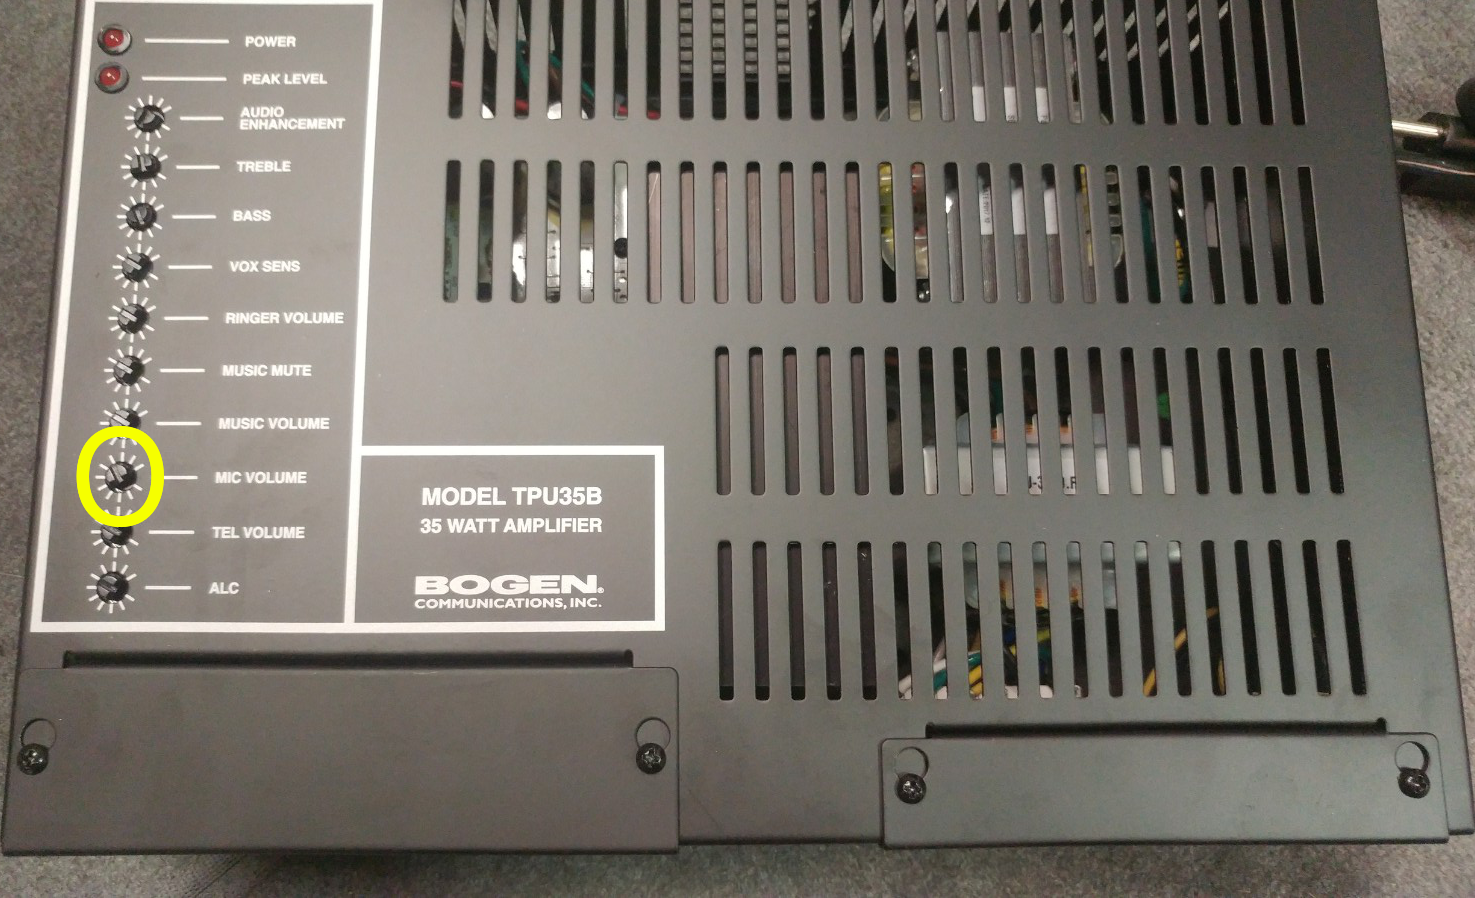
-
If the volume needs adjusting, make sure to not increase the headset volume on the Polycom past 50% of the maximum. Increasing the volume more than this on the phone may incur unwanted distortion in the output sound. If you need to increase the volume of the speaker, use the MIC knob on the amplifier.
Make sure to increase the volume in SMALL increments. Overdriving the speakers may cause serious damage to the amplifier or the speakers. Equipment damage due to overdrive is not covered under any warranty or service plans.

No other adjustments should be needed other than the MIC volume. All other values have been set by your vendor prior to shipment. If you feel that your paging system is not performing the way you expect, please contact technical support prior to making any additional adjustments.
- After testing, you may now replace the connections with the final speaker wire connections. Make note to keep the signal wires going to the same places they were when testing.


Related articles
Apple Mac -- Remote Desktop 10
Step 1
1) Launch the App Store
2) Locate: Remote Desktop 10
3) Use the 'Get' button to download and install this application
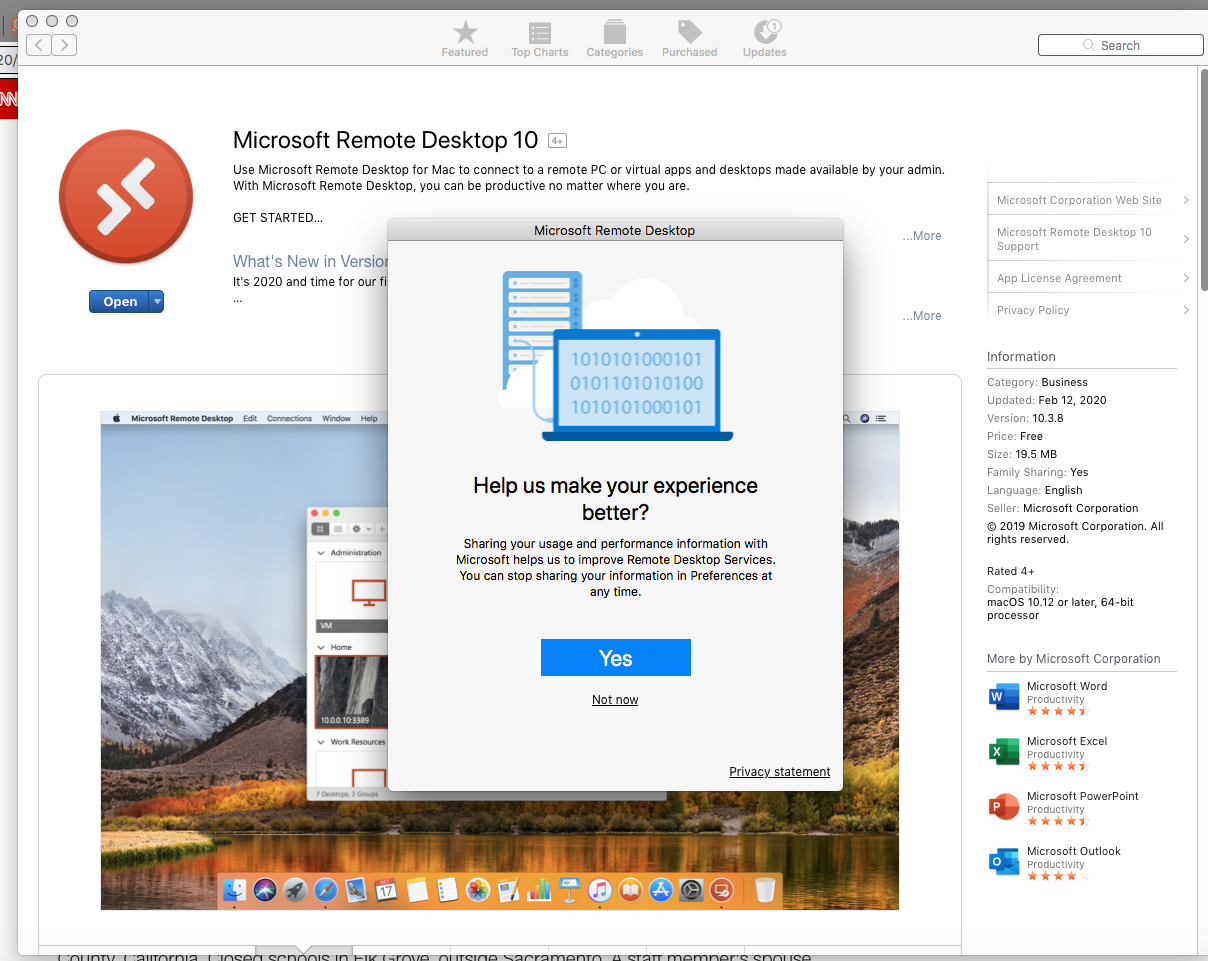
4) Use the 'Open' button to start the application
5) Feel free to skip the survey, and click 'Not now'
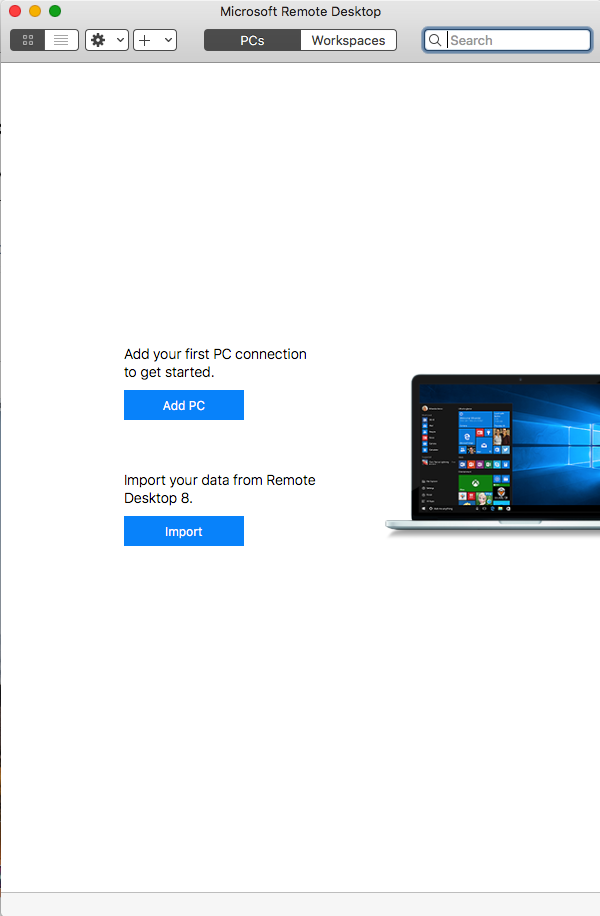
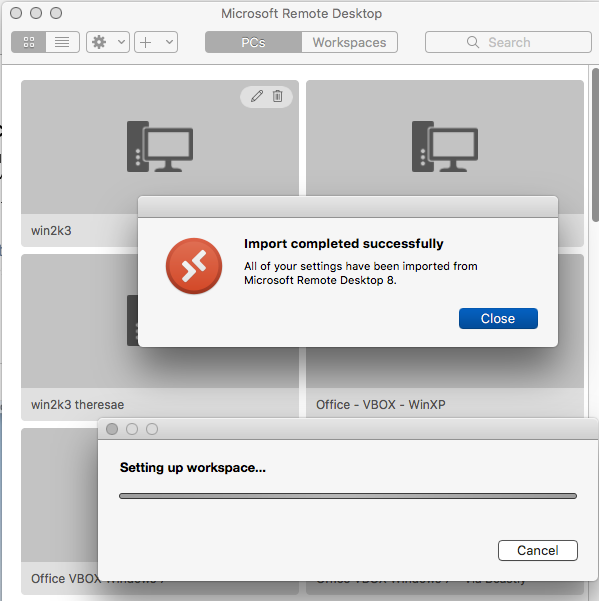
Step 2
Use the 'Import' button to pull your settings from Remote Desktop 8
Step 3
When the import is complete, use the 'Close' button to continue
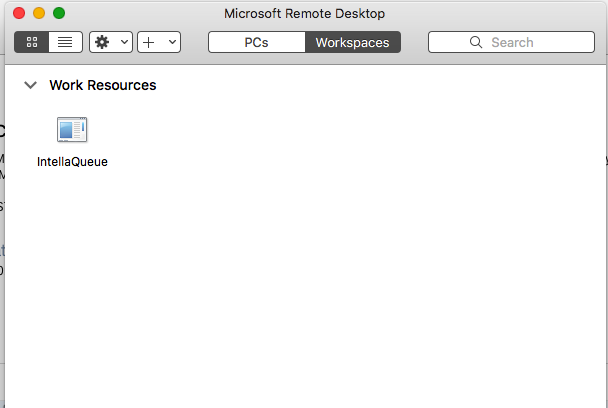
Step 4
2) You can now launch intellaQueue by double-clicking the icon.
Step 5 (Optional)
1) Right-click or CMD-Click on the Remote Desktop 10 Icon in your Application Bar.
2) Select 'Keep In Dock' to ensure quick access to this new application.
OpenVPN Installation - Windows 7 and Windows 10
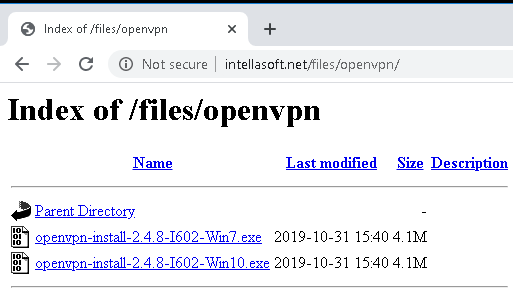
Step 1
2) Select the installer for your system (Win7 or Win10)
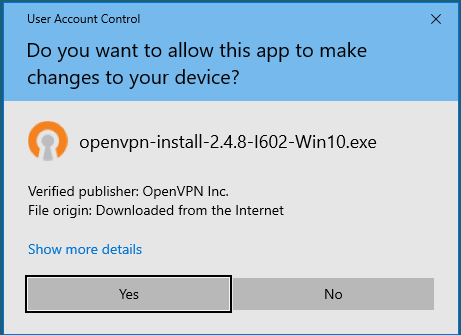
Step 2
1) Run the installer
2) Accept the system changes
Step 3
1) Accept the default installation options.
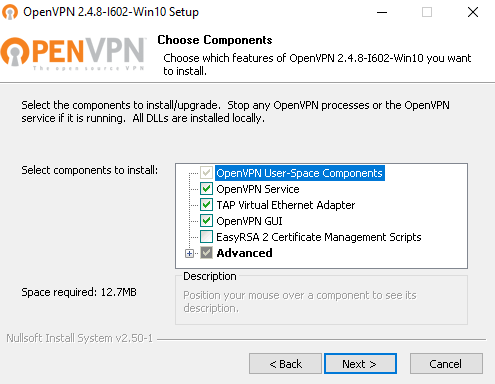
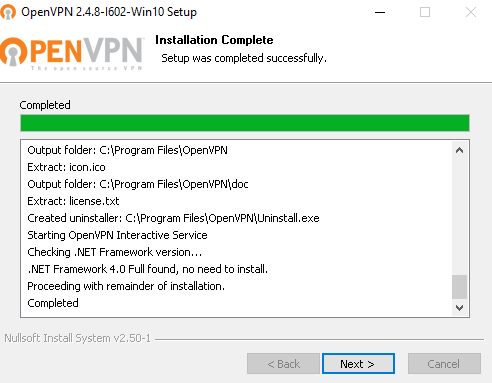
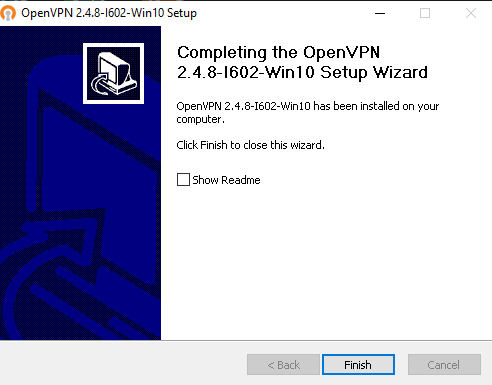
2) Uncheck 'Show ReadMe' and click Finish
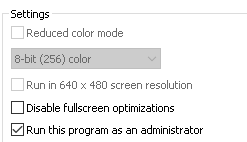
Step 4
1) Right-click the desktop 'OpenVpn' and go to Properties
3) If the option is visible for ''Change settings for all users', click this button
4) Enable 'Run this program as an administrator'
5) Save the changes
Step 5
Every connection needs a UNIQUE VPN Configuration. Do not deploy the same VPN Configuration to multiple machines, they will conflict and knock each other offline.
3) Click the 'Create VPN Config' button on the lower right-hand corner, under 'Additional Extension Settings'
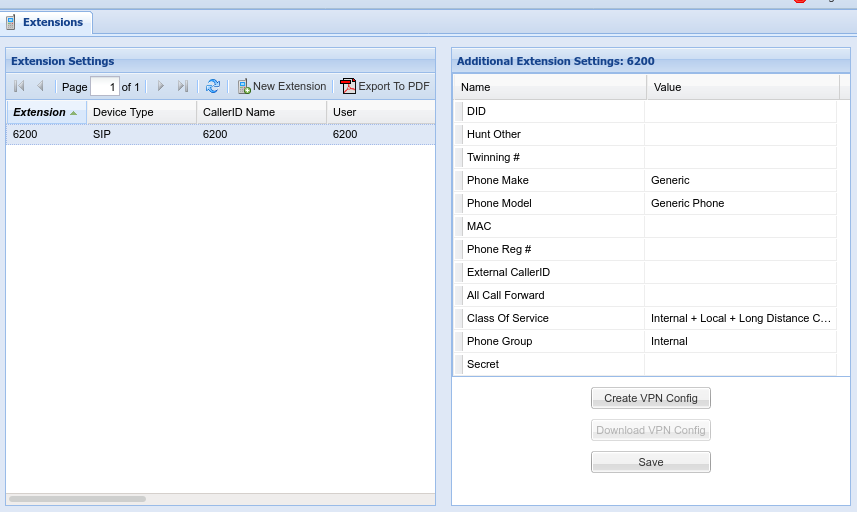
6) Refresh the interface using the Refresh icon located near 'New Extension'

7) Click 'Download VPN Config'
8) The file matching the selected extension will be downloaded. In this example, it will be 6200.zip
Step 6
Deploy the <YourServerName>.ovpn file to the Client machine by placing it in the C:\Programs Files\OpenVPN\config directory on the Client machine.
You will need Administrator privileges to place the file in this location
Step 7
1) Launch OpenVPN
2) Right-click the TaskBar and go to 'Taskbar Settings'
3) Under 'Notification area' choose: 'Select which icons appear on the taskbar'
4) Set OpenVPN GUI for Windows to 'On'
5) Close the settings
Step 8
1) Right-click on the OpenVPN GUI Icon in the System Tray. This is the LCD/Monitor Icon with a lock next to it.
2) Click 'Connect'

Step 9
1) Once the VPN is successfully connected. The client IP address should pop up next to the OpenVPN Icon
2) Installation is now completed. The client computer can now access vpn-enabled resources.
3) Assuming there is an associated SoftPhone application to go along with the OpenVPN connection.
Instruct the user to:
1) Start PC
2) Start OpenVPN - Wait for connection
3) Start Soft Phone Application
Troubleshooting
VPN Connection Failure
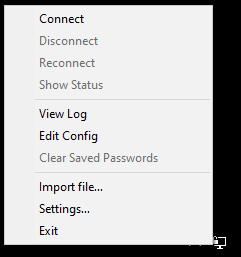
1) Right Click the OpenVPN Icon, click 'View Log'
2) Send the log to Technical Support
MicroSIP
MicroSIP is a portable SIP softphone based on the PJSIP stack available for Microsoft Windows. It is an alternative SIP softphone for Windows devices.
Installation
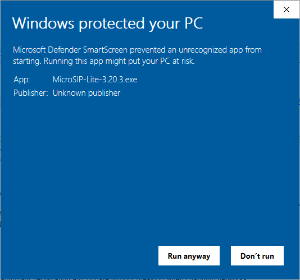
1) Download the latest version of the client from the MicroSIP website. At this writing, the current version is 3.20.3. There are two versions, as we do not yet support video, you can use the Lite version.
2) If you get an error message from Windows 10 Defender saying "Windows protected your PC," this can be safely ignored.
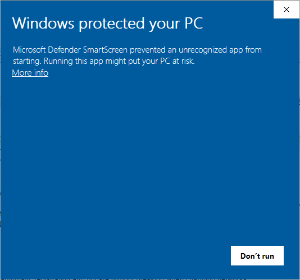
3) Click the underlined words saying More info and a second button will appear, saying Run anyway (see below). Click that button, and you can proceed with the installation normally.
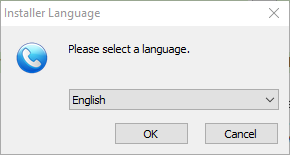
4) Unless you have a reason otherwise, select English from the list and press OK.
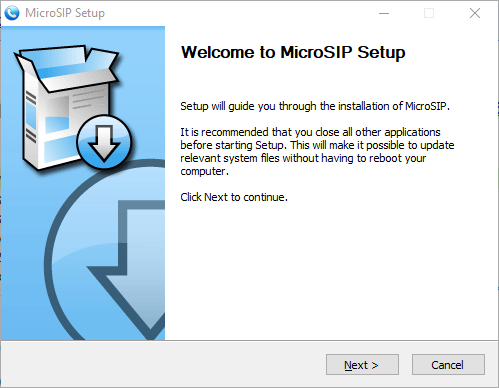
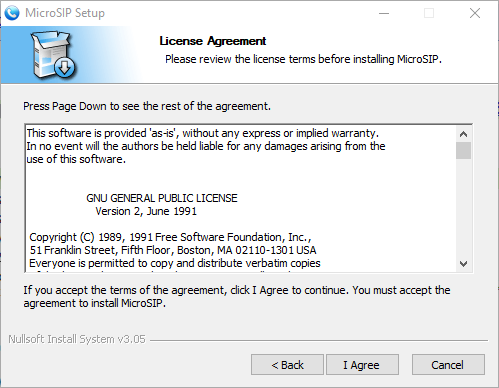
5) Click Next when prompted, and I agree to skip the EULA.
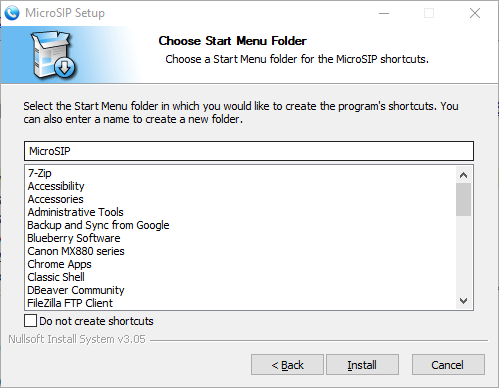
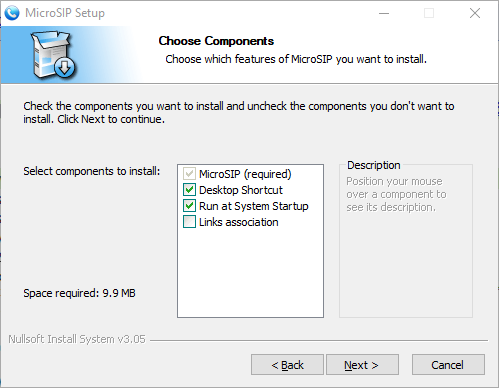
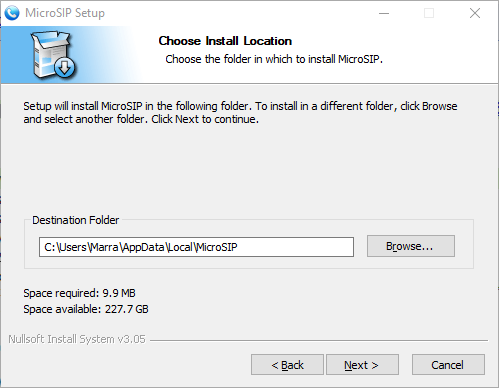
6) If this will be the only SIP client you are using, you can leave the defaults. If you are using another SIP client that you would prefer to remain the default, uncheck the fourth box for Links association. By default, the program will install in your AppData folder, so it does not require administrative rights. Continue with the defaults until the program is installed.
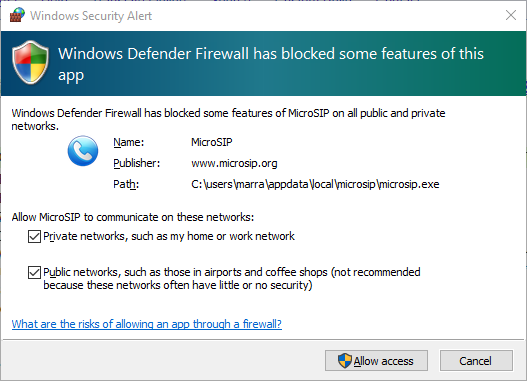
7) Upon running for the first time, the program may request access through the firewall. Ensure you check Public networks, or you will not be able to make calls from locations outside of your office.
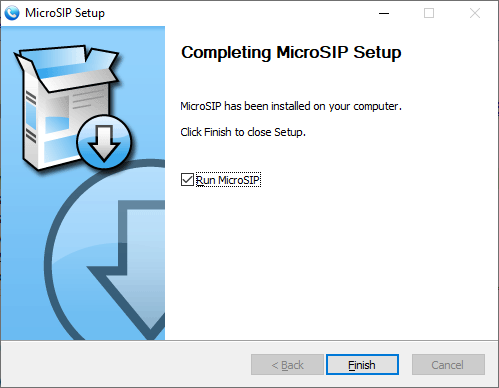
8) Now that the program is running, you can move on to the next step
Configuration
1) Now that the MicroSIP application is running, add your SIP server information to make calls.
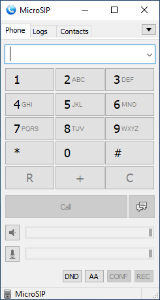
2) Click on the downward-facing arrow in the top right corner, and a menu will appear. Click on Add Account to create your first account.

3) The below is only an example. You'll need to use the server name and credentials given to you by your administrator.
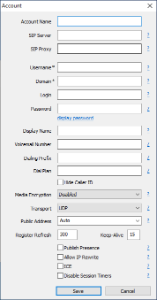
- Account Name: This is just a label, you can type in your extension number.
- SIP Server, SIP Proxy, and Domain are typically all the same. These will be provided by your administrator.
- Username and Login, are both the same. These will be provided by your administrator.
- Password will be based on your personal extension details. These will be provided by your administrator.
Please use copy/paste for all settings given by your administrator to avoid typos and configuration issues.
Additional Settings
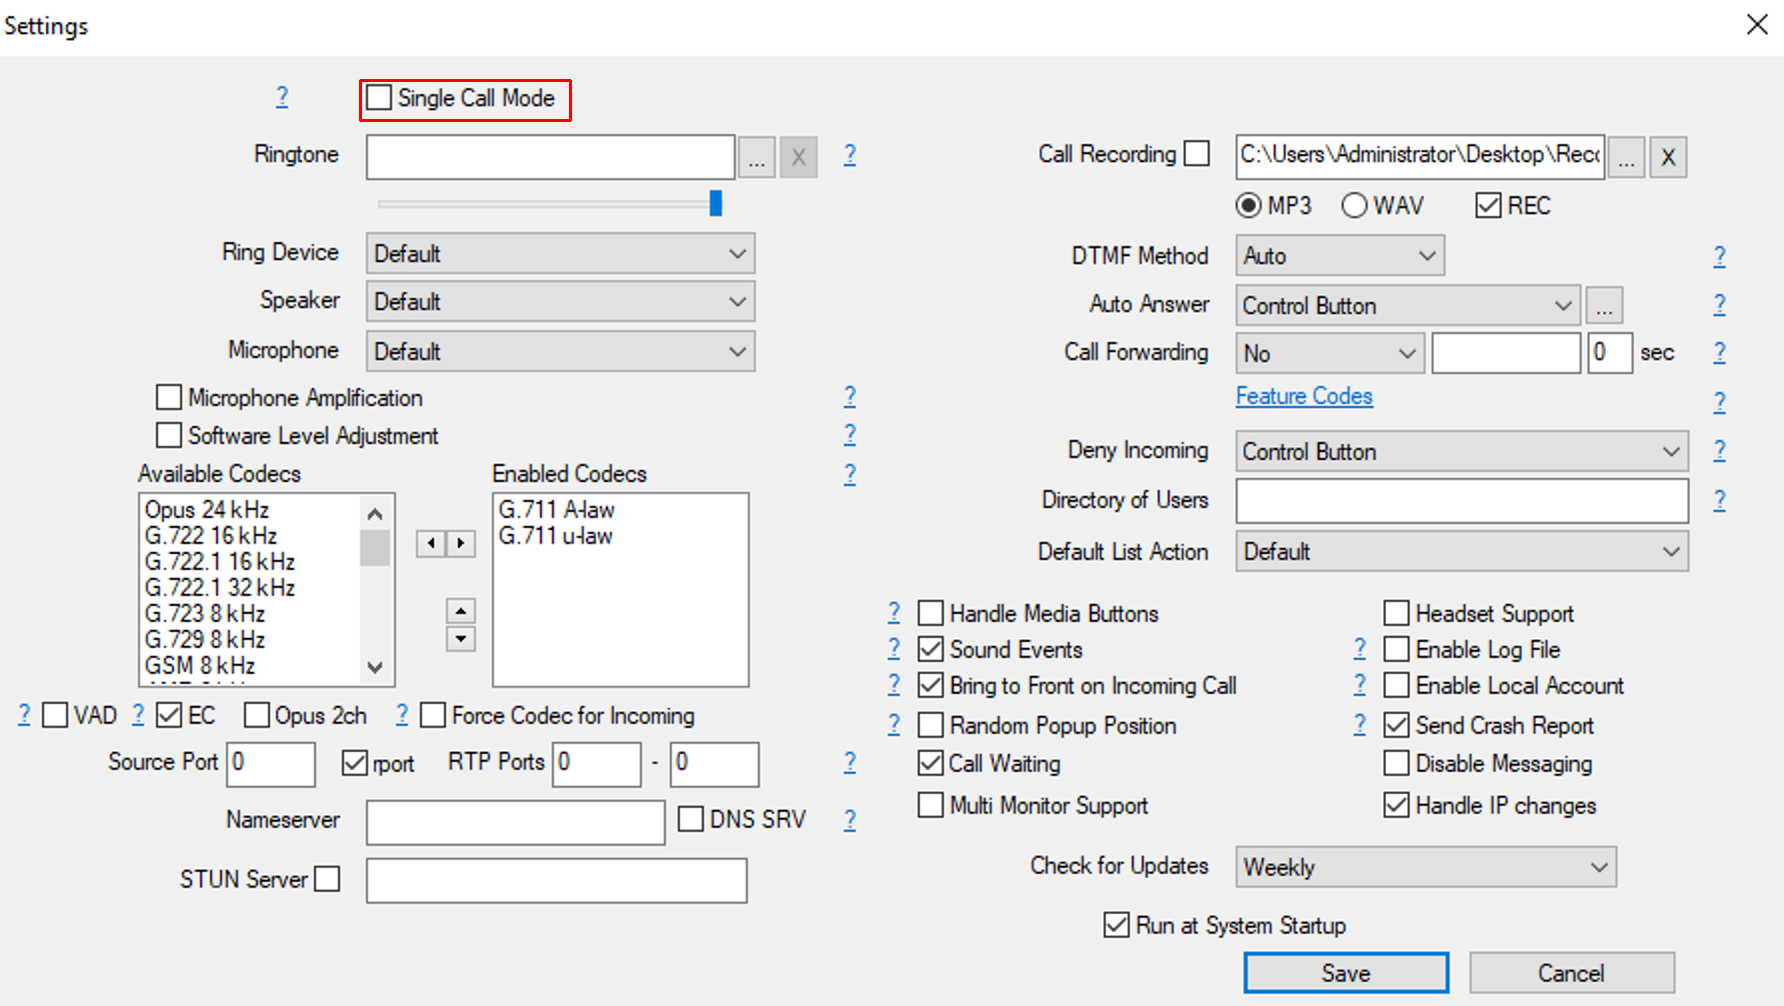
Ensure 'Single Call Mode' is Off
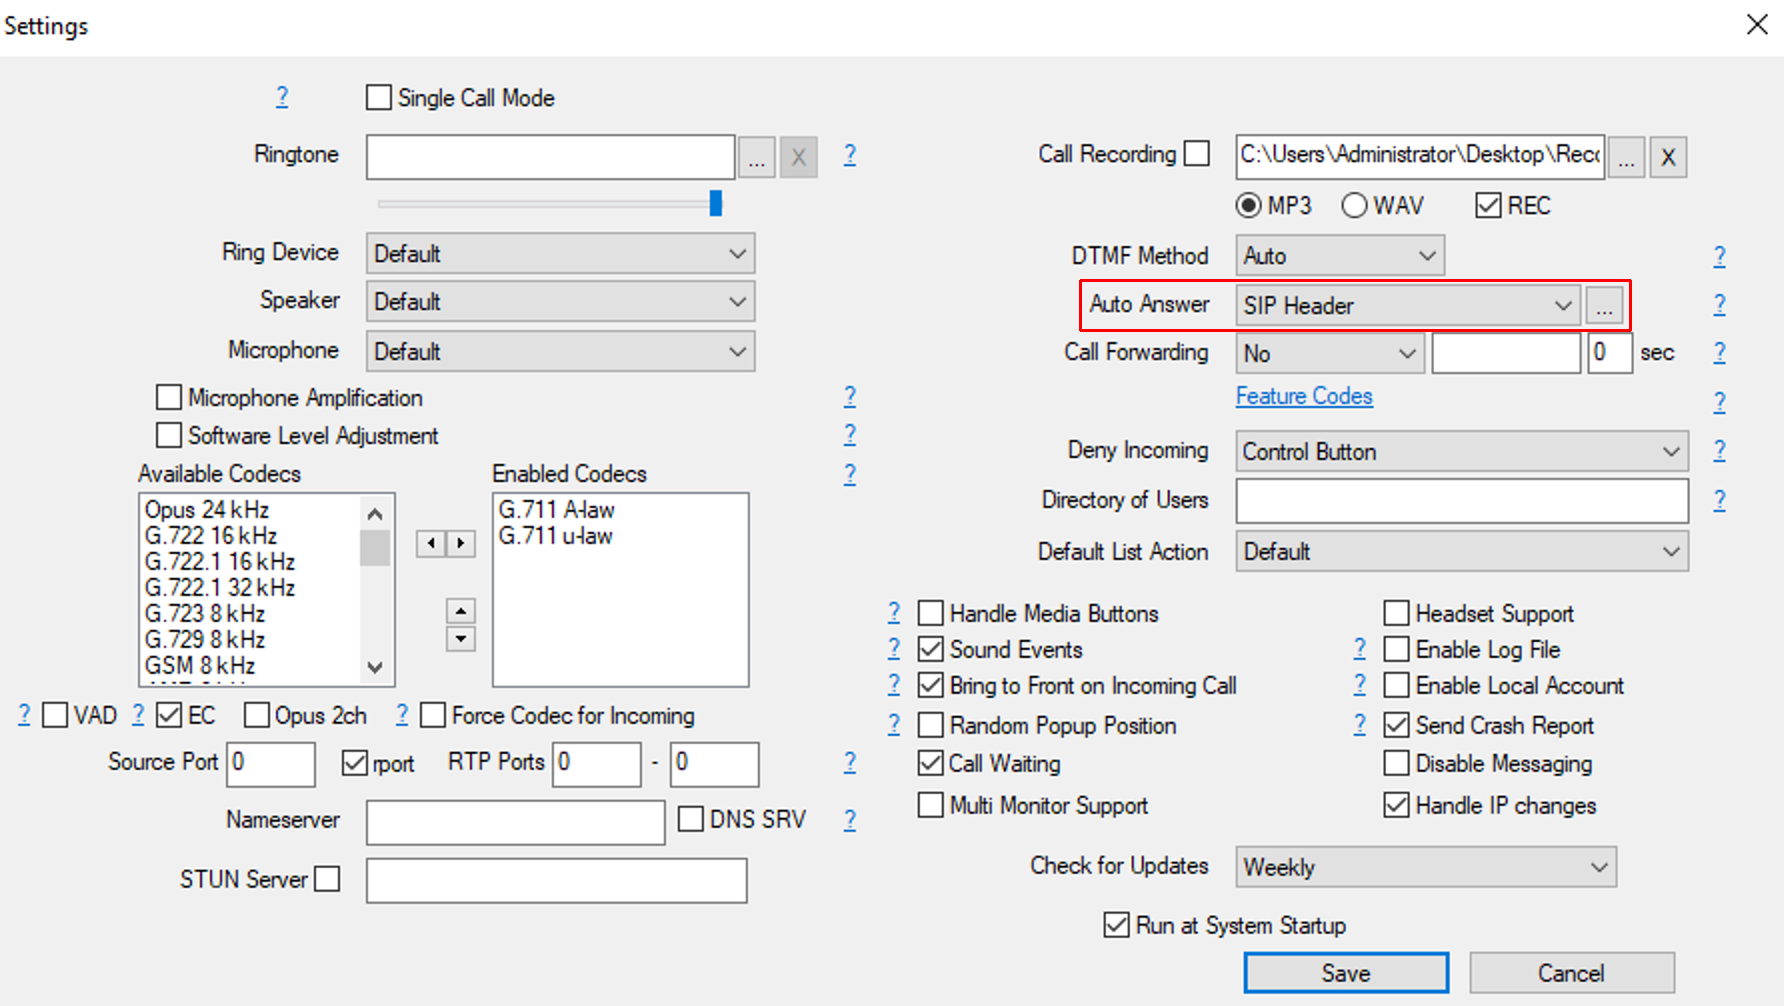
Set: Auto Answer -> SIP Header (This is important for CallCenter / Dialer Agents)
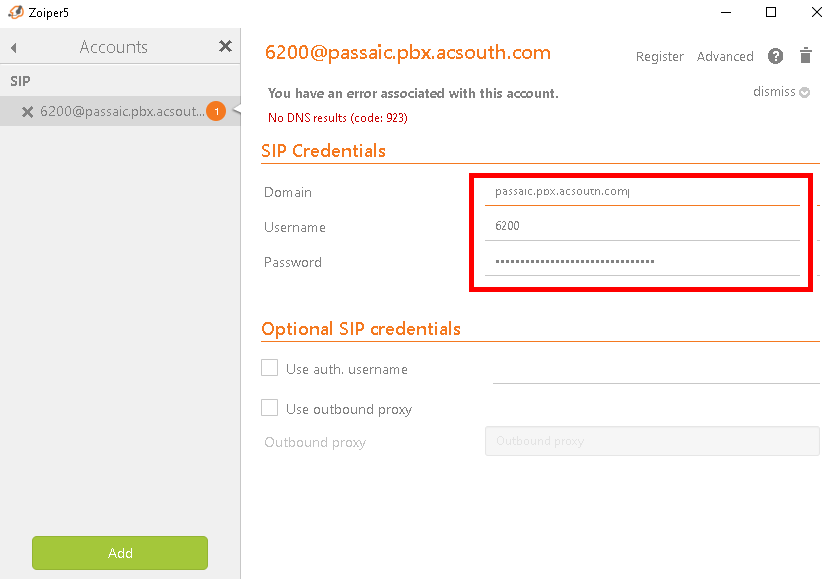
Zoiper Configuration
1) To set, or re-set a Zoiper Soft Phone Configuration. Click the 'Gear' Icon

2) Click 'Accounts'
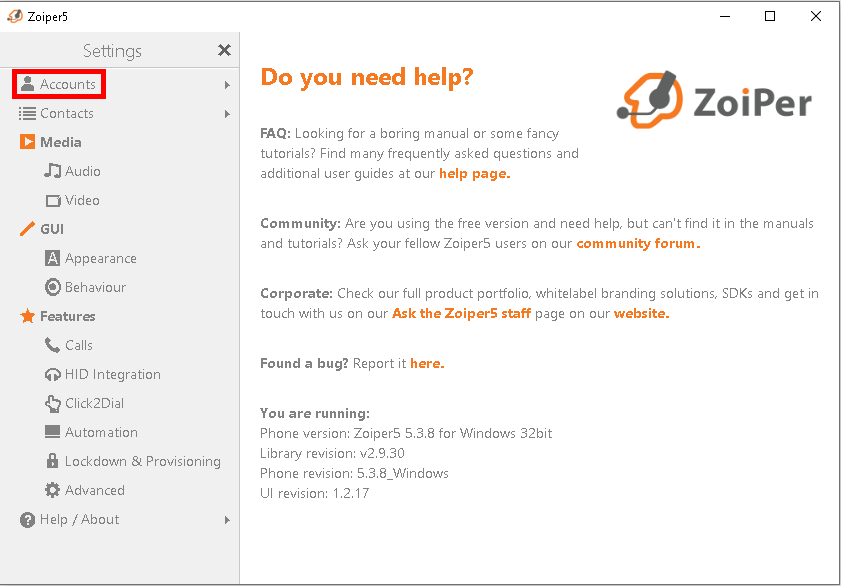
3) Then edit the hostname or credentials in the following section:
Linphone 4.X
Linphone - Installation Guide
Installing the latest version
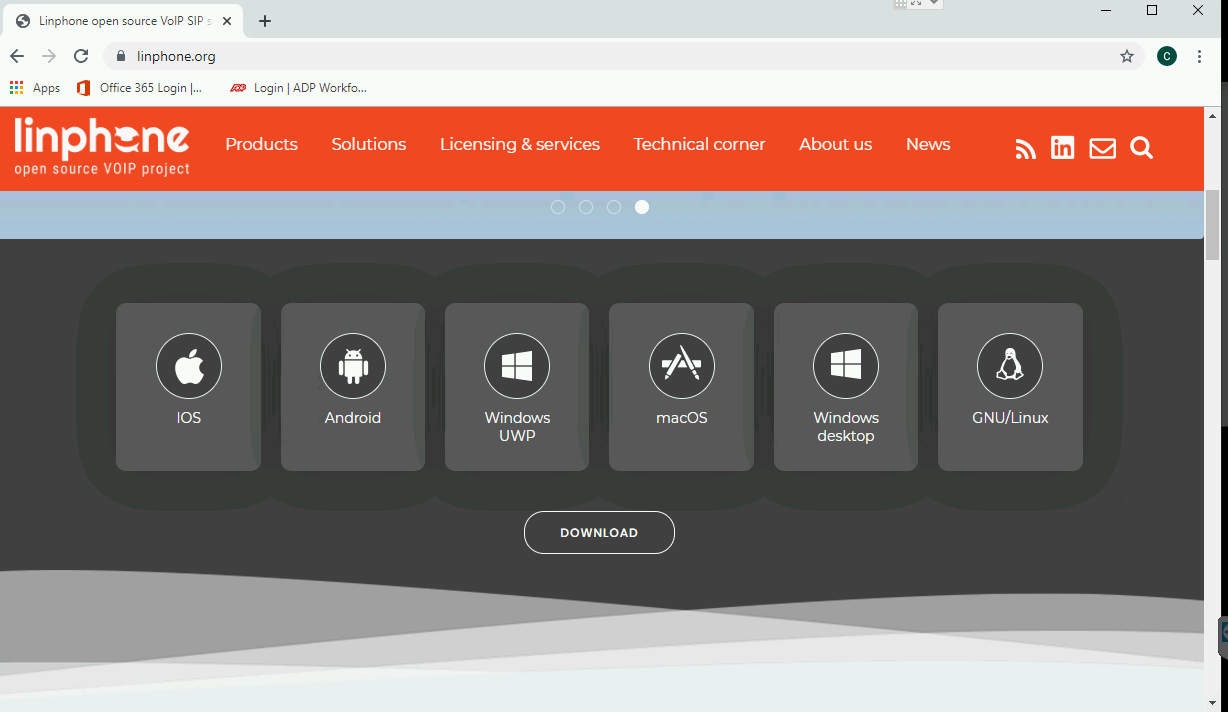
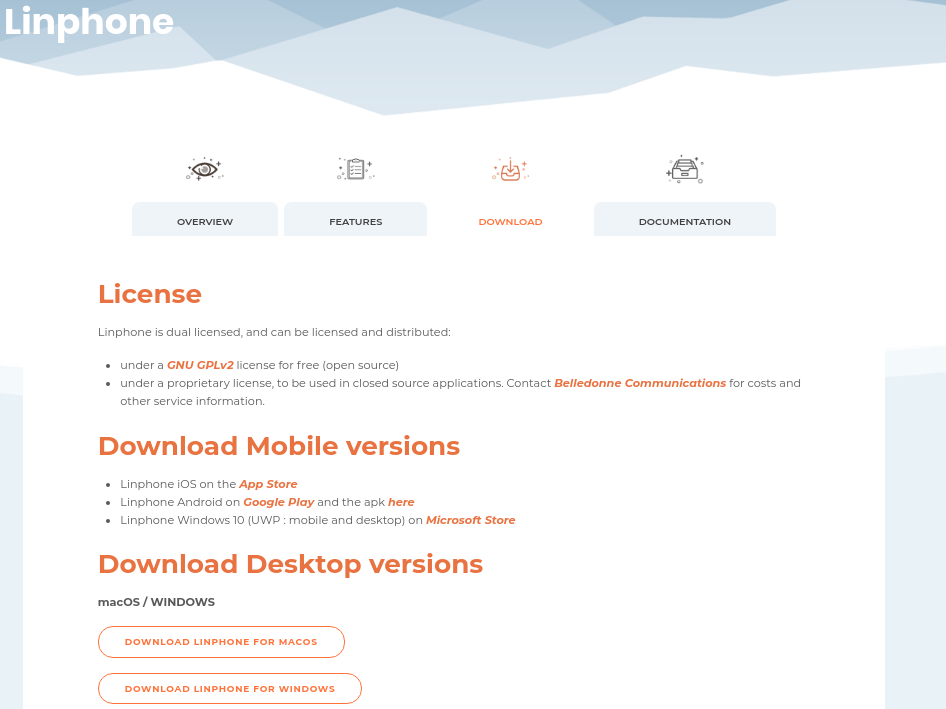
1) Go to http://www.linphone.org
2) Click on 'Download'
3) Download the Linphone package for your specific system (Windows / Mac)
| Linphone Main Page | Download Page |
|---|---|
|
|
|


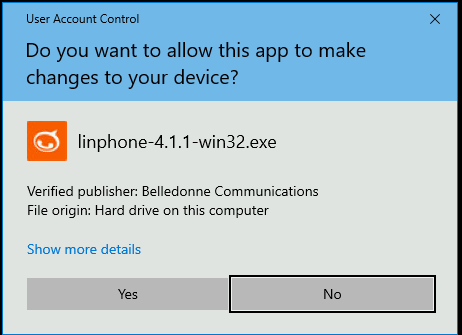
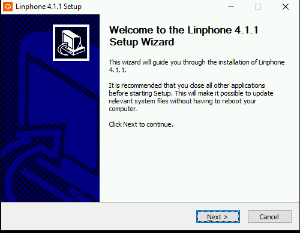
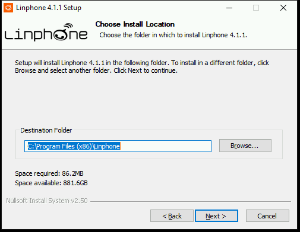
4) Start the installer, and accept any changes.

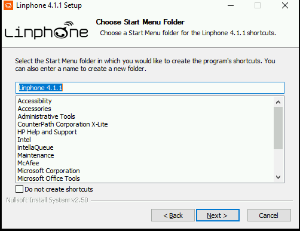
5) Navigate through the next few screens.
| Click 'Next' | Click 'I Agree' | Click 'Next' | Click 'Next' |
|---|---|---|---|
|
|
|
|
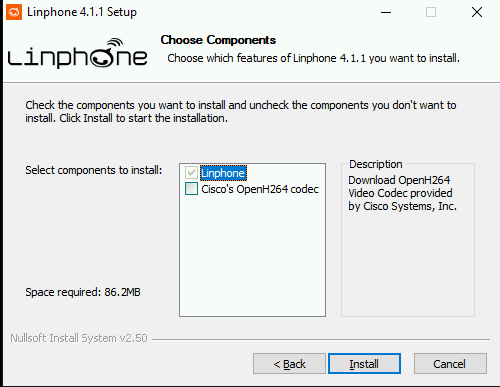
|


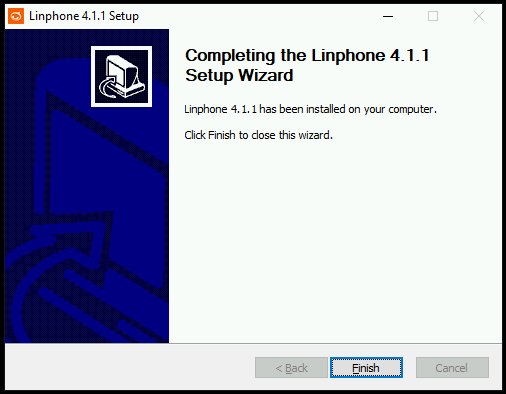
6) Cisco Openh264 is not required and can be left unchecked.

7) Click 'Finish'

Linphone Icon Setup
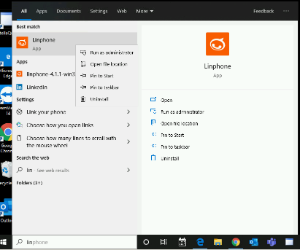
1) If you wish to create a desktop icon, you can search for Linphone using the start menu and then right-click to get to the 'Open file location'
2) Right-click and drag to the desktop to create a shortcut

Linphone Configuration

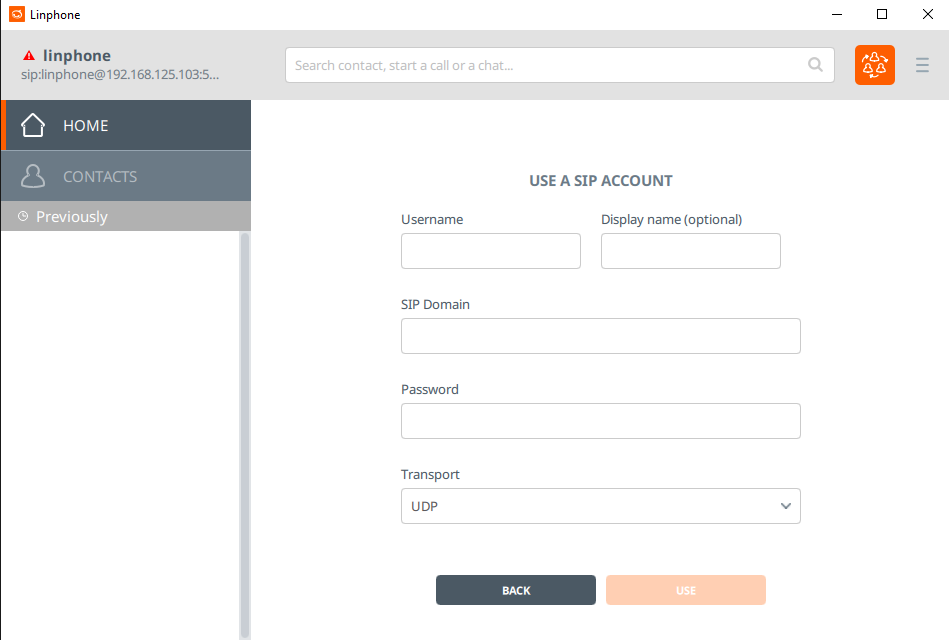
2) The following screen will appear.

3) Fill out all the fields
| Username |
Extension number for this new phone |
| SIP Domain | The server address of the system |
| Password |
Secret token for this extension. This is a secure, machine-generated password, it is highly recommended to copy and paste this password, rather than typing it manually to avoid errors. Incorrect passwords will result in the PC being blocked from the voice communications server for up to 15 minutes |
| Transport | Unless otherwise instructed, set to 'UDP' |
4) If you see the following screen, the entered username/extension or password is incorrect.

5) The following screen will show if the login credentials are correct.

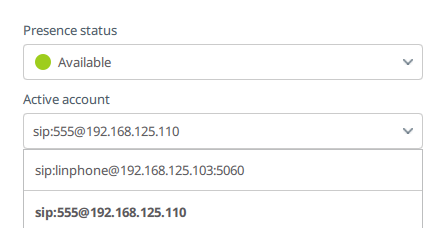
Switch to the newly activated Soft Phone Account.
1) Click the top left corner red triangle
2) Select the newly configured extension

3) Choose the new Soft Phone Account
4) Set the 'Active Account' to the second item in the list

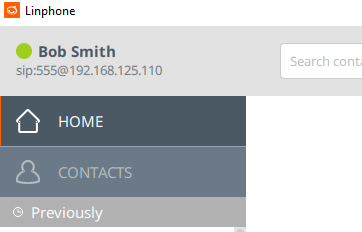
5) Setup has been completed when the icon in the top left corner turns green

Final steps. Application Configuration
1) Click the 'Triple Bar' for Preferences at the top-right of the application


If you don't have an SBC System skip steps 2-3
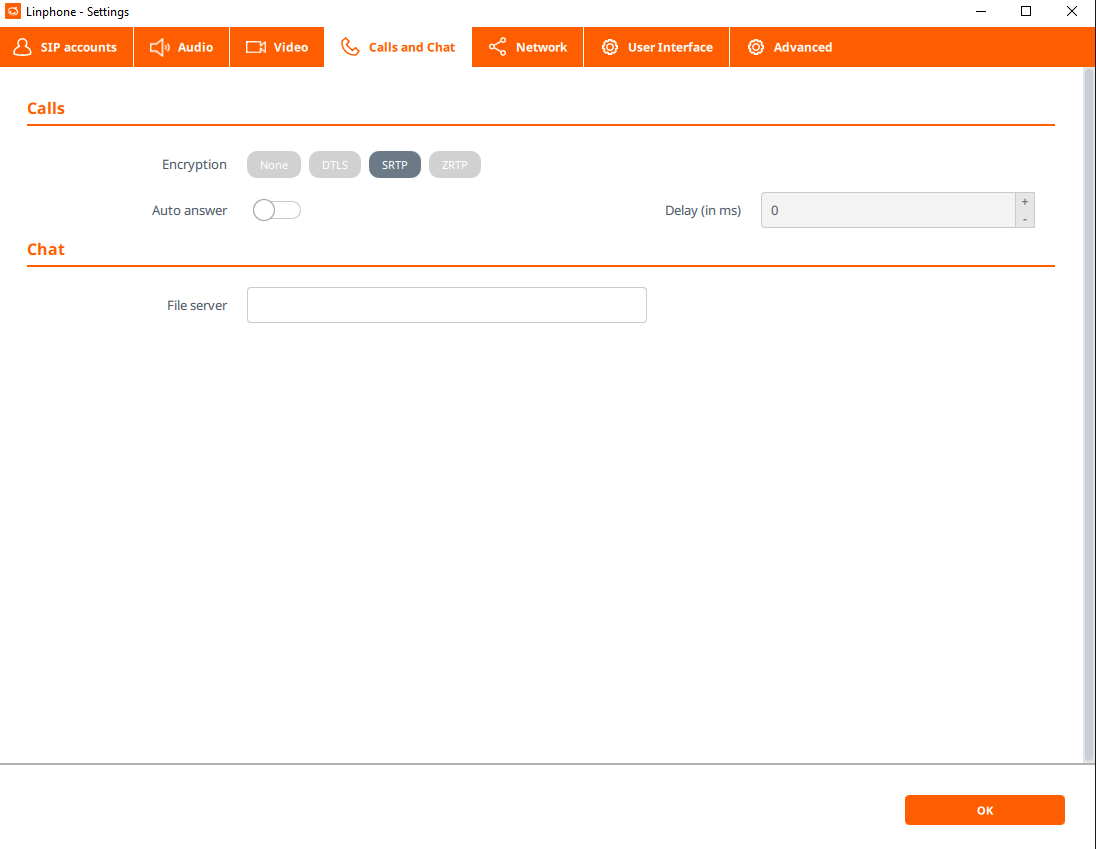
2) While in the Preferences/Settings screen, click the "Calls and Chat" screen
3) Under "Encryption", click "SRTP"

Lastly...
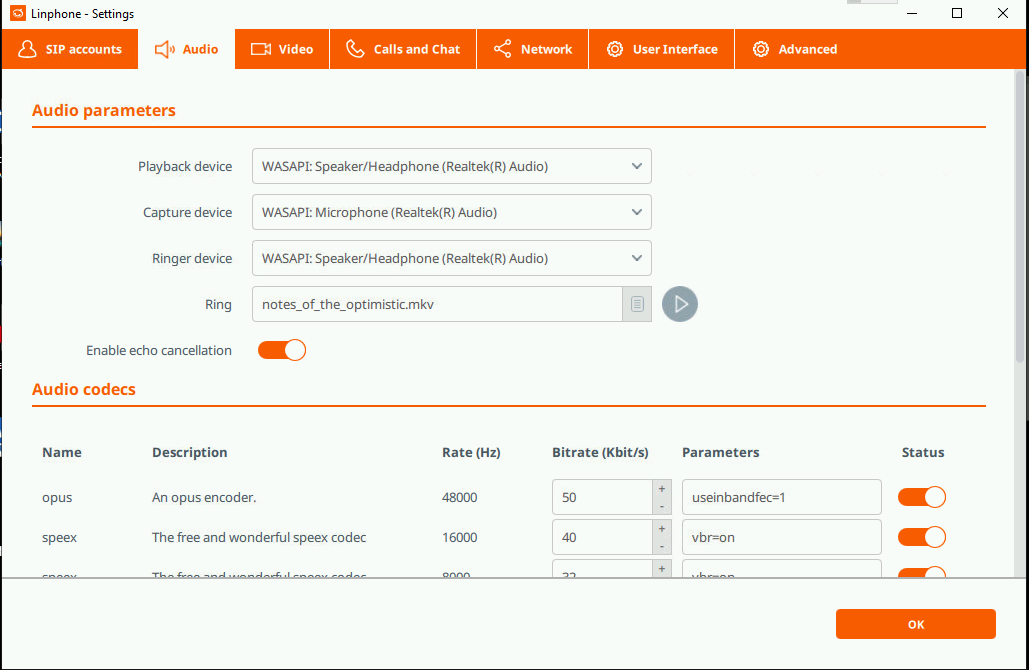
1) While in the Preferences/Settings Screen, Click the 'Audio' tab to set up the devices for speaking and playback.
Typically, Playback/Capture will be a USB Headset and the ringer device will be the built-in speakers (To be able to hear the phone ringing without the headset on)
If the USB Headset is not showing, close and re-launch Linphone
Warning: Do not make any other changes that are not described here. Other changes may cause your software to malfunction.
2) Click 'OK' when finished with the configuration.
Note: When hitting the 'X' (Close) button for Linphone, it may be still running. If you wish to completely stop the Soft Phone Application. Check the system-tray for Linphone, right click and select 'Exit'
Troubleshooting tips
If you are installing Linphone on a Mac, you must give permission to Linphone to use the microphone after installation. Failure to do so will cause the microphone to not work at all in Linphone, but work in all other applications.
To do so, first close Linphone entirely. Click on Settings, then Security. From the list of peripherals on the left side, select the microphone. If the lock icon on the bottom of the window is locked, click it to access the settings that are disabled. Linphone should be checked. Close the windows and retest.

Linphone - Installation Guide - Secure-SBC
Installing the latest version
http://www.linphone.org
Then to 'Download'
- Download the Linphone package for your specific system (Windows / Mac)
| Linphone Main Page | Download Page |
|---|---|
|
|
|
| - Start the installer, and accept any changes. |
|---|
|
|
| Click 'Next' | Click 'I Agree' | Click 'Next' | Click 'Next' |
|---|---|---|---|
|
|
|
|
|

| - Cisco Openh264 is not required and can be left unchecked. | Click 'Finish' |
|---|---|
|
|
|
Linphone Icon Setup
You may wish to create a desktop icon. You can search for Linphone using the start menu and then right click to get to the 'Open file location'
- Right-click drag to the desktop to create a shortcut
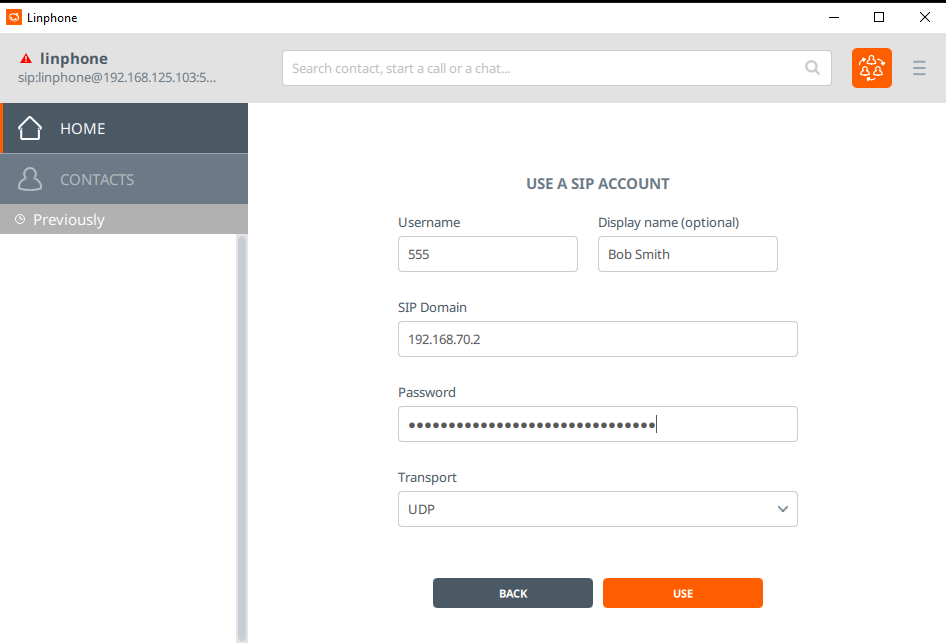
Linphone Configuration
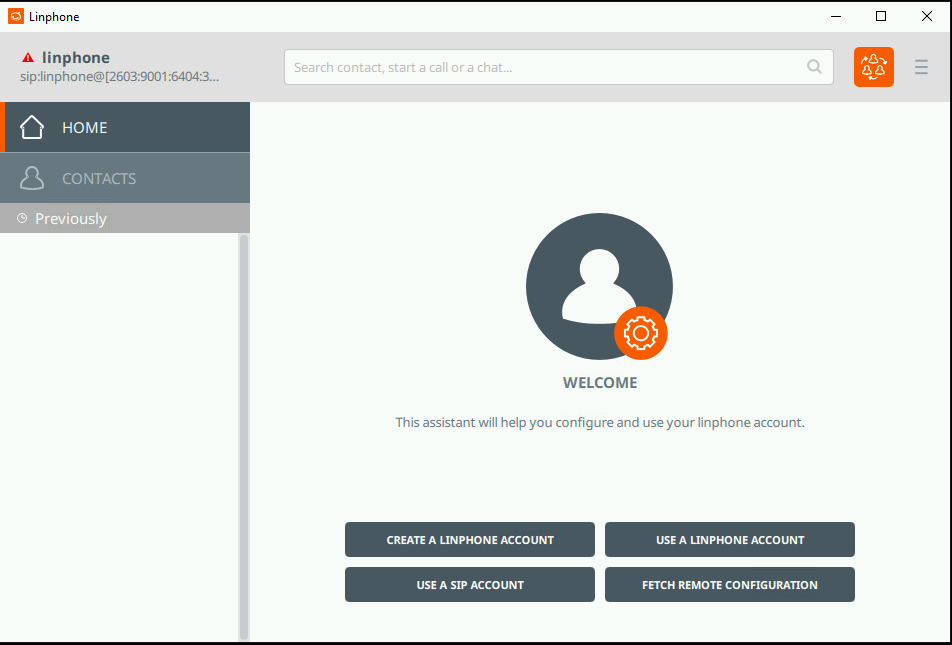
|
Linphone is installed *without* any configured extension. |
Click on 'Use A Sip Account' on the bottom of the application. The following screen will show. |
|---|---|
|
|
|
|
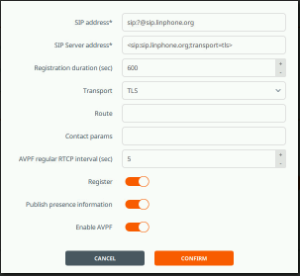
Fill all form fields. Username: Extension number for this new phone SIP Domain: The server address of the system Password: Secret token for this extension * Note regarding password. This is a secure, machine-generated password, it is highly recommended to copy and paste this password, rather than typing this manually to avoid errors. * Note, incorrect passwords will result in the PC being blocked from the voice communications server for up to 15 minutes Transport: Unless otherwise instructed, set to 'TLS' When done filling out this form, click 'Use' |
If you see the following screen, the entered username/extension or password is incorrect. If you have been blocked by the system, this block will automatically expire after 15 minutes, or a systems administrator can remove it. |
The following screen will show if the login credentials are correct. |
|---|---|---|
|
|
|
|
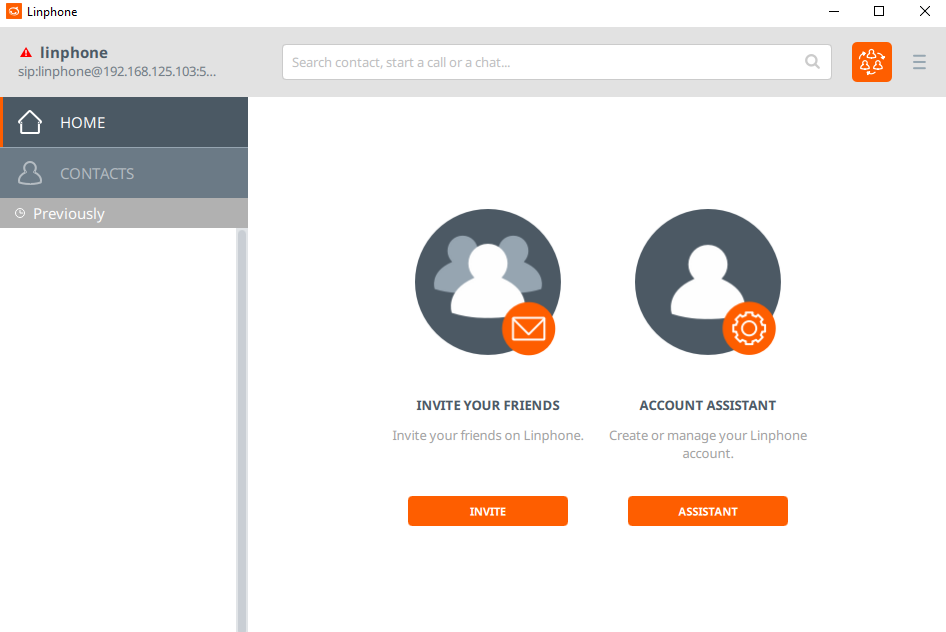
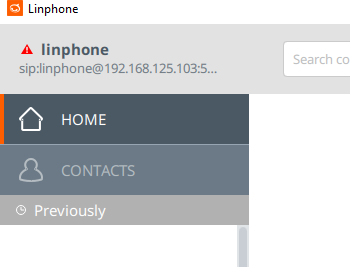
Switch to the newly activated Soft Phone Account.
|
- Click the top left corner red triangle - Select the newly configured extension |
Choose the new Soft Phone Account - Set the 'Active Account' to the second item in the list |
Setup has been completed when the icon in the top left corner turns green |
|---|---|---|
|
|
|
|
Final steps. Application Configuration
| - Click the 'Triple Bar' for Preferences at the top-right of the application |
* Step required for SBC Systems While in the Preferences/Settings Screen - Click the 'Calls and Chat' screen - Under 'Encryption', Click 'SRTP' |
|---|---|
|
|
|


Lastly...
|
While in the Preferences/Settings Screen - Click the 'Audio' tab to set up the devices for speaking and playback. - Typically, Playback/Capture will be a USB Headset - Typically, Ringer device will be the built-in speakers (To be able to hear the phone ringing without the headset on) Note: If the USB Headset is not showing, close and re-launch Linphone Warning: Do not make any other changes that are not described here. Other changes may cause your software to malfunction. Click 'OK' when finished with the configuration. |
Note: If you wish to completely stop the Soft Phone Application, Note: - When hitting the 'X' (Close) button for Linphone, it may be still running - Check the system-tray for Linphone, right click and select 'Exit' |
|---|---|
|
|
Linphone Mobile - Installation Guide
2) Locate and install the application: Linphone - By Belledonne communications
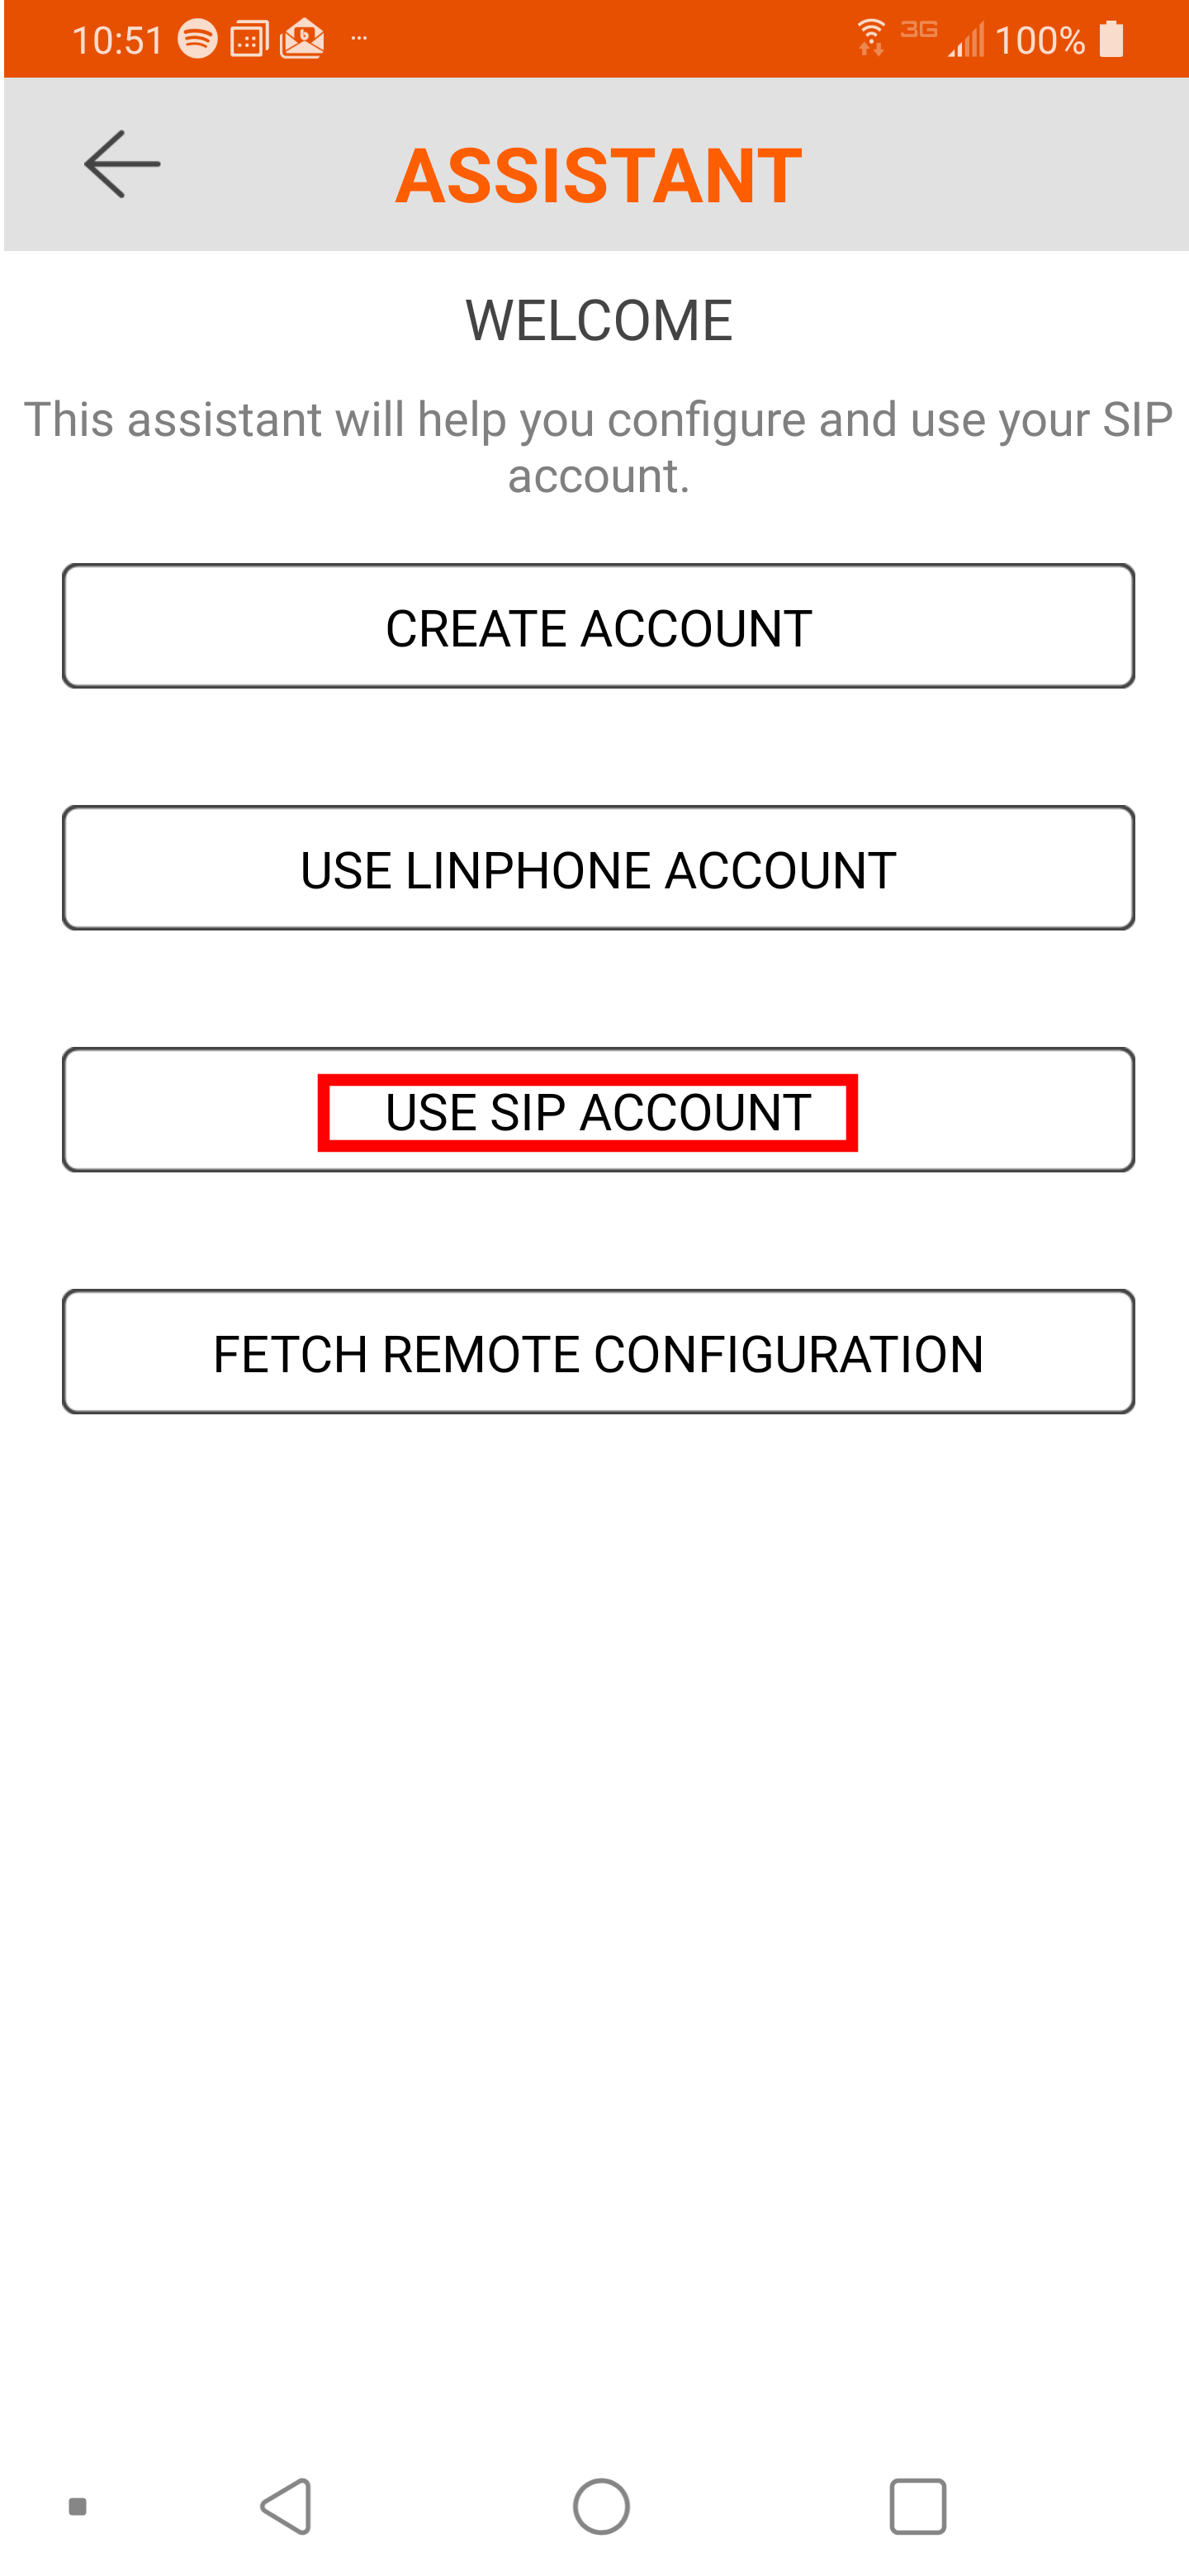
3) From the Linphone main screen, click "Use a SIP ACCOUNT"
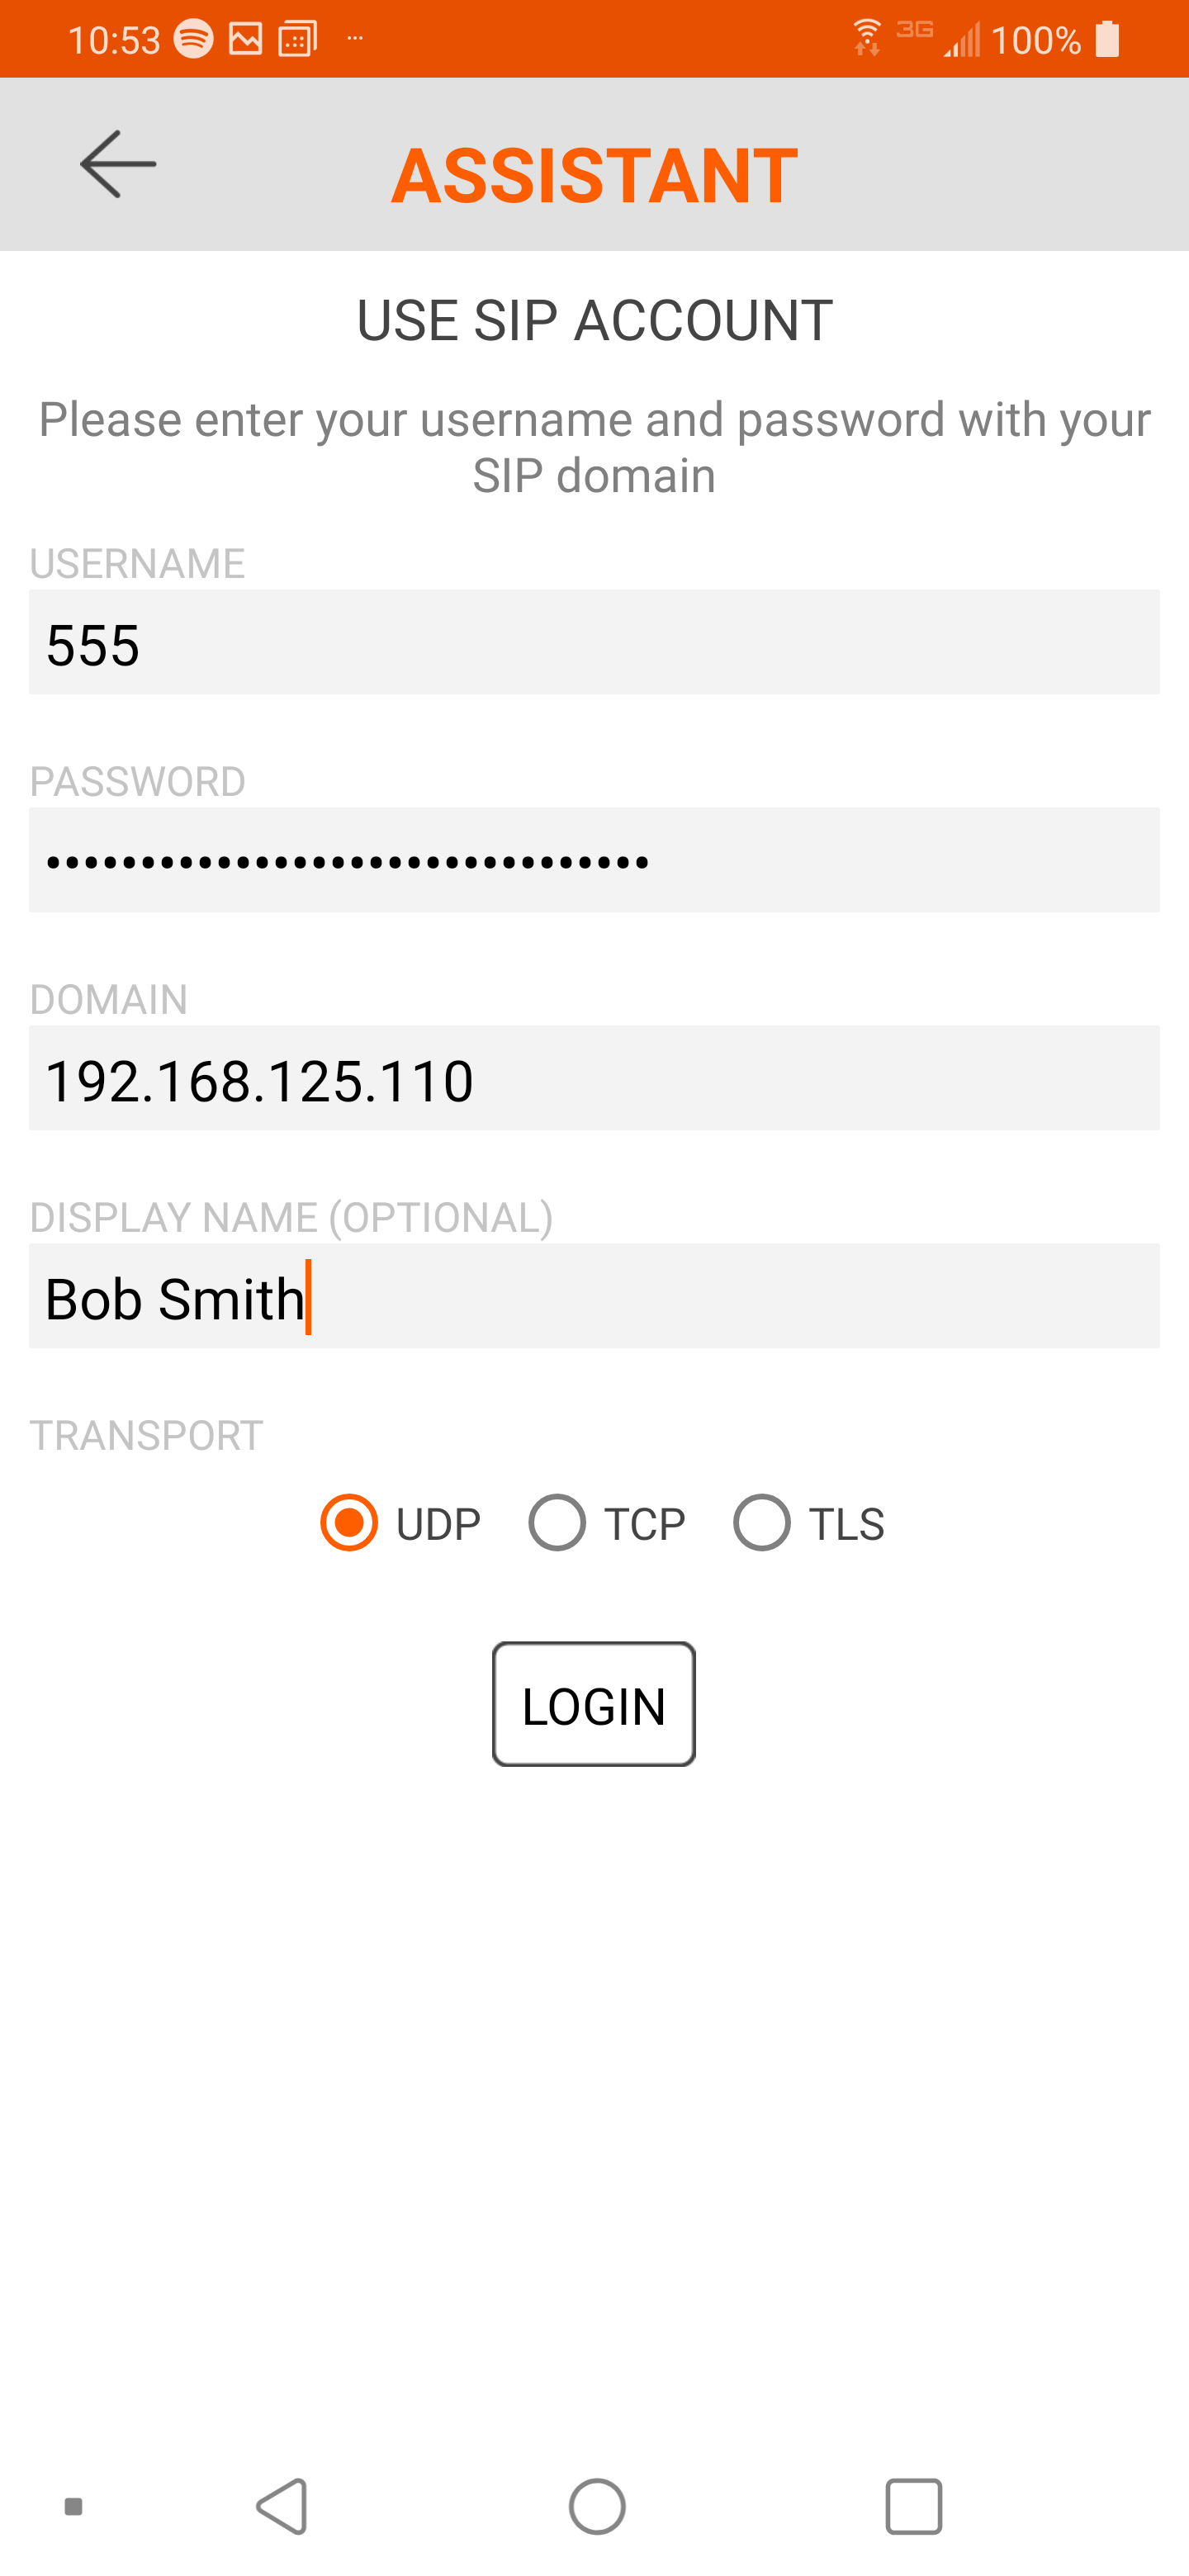
4) Fill out all the fields
| Username |
This is the extension of the phone |
| Password |
Secret token for this extension. This is a secure, machine-generated password, it is highly recommended to copy and paste this password, rather than typing it manually to avoid errors. Incorrect passwords will result in the Phone being blocked from the voice communications server for up to 15 minutes |
| Domain |
This is the Server Hostname or IP Address of the Communications Platform |
| Transport | Unless otherwise instructed, set to 'UDP' |
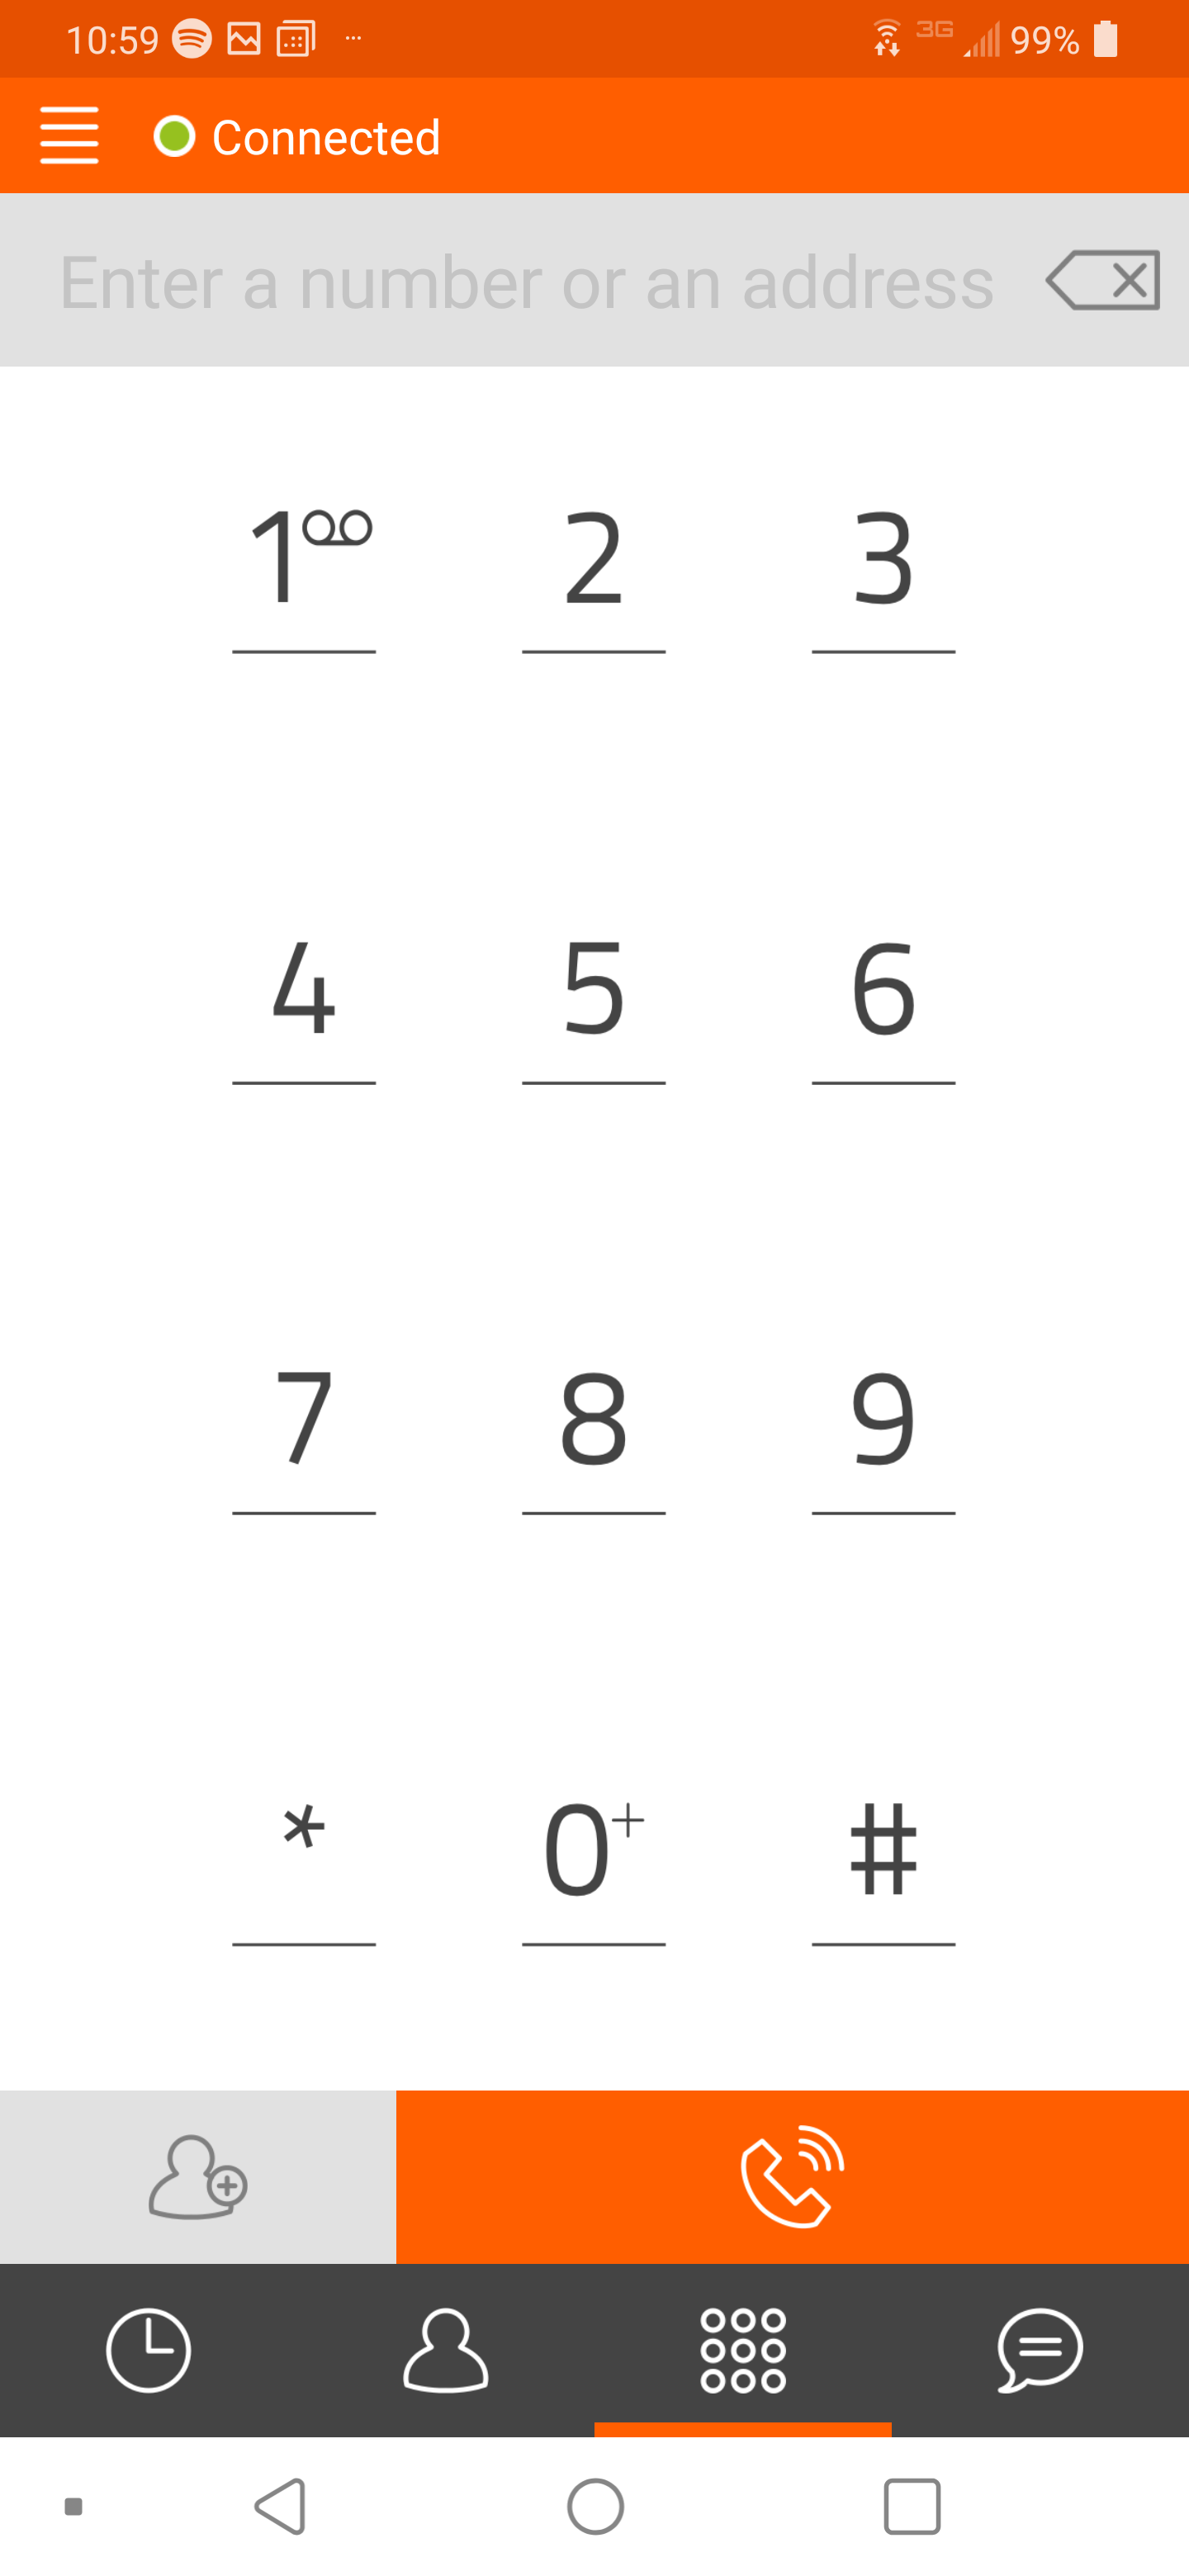
5) If the Domain, Username and Password combination are correct, you will next see a dialpad with a green circle at the top left. This indicates the application is connected.
Setting up an SBC
If you are not using an SBC, skip steps 6-8
|
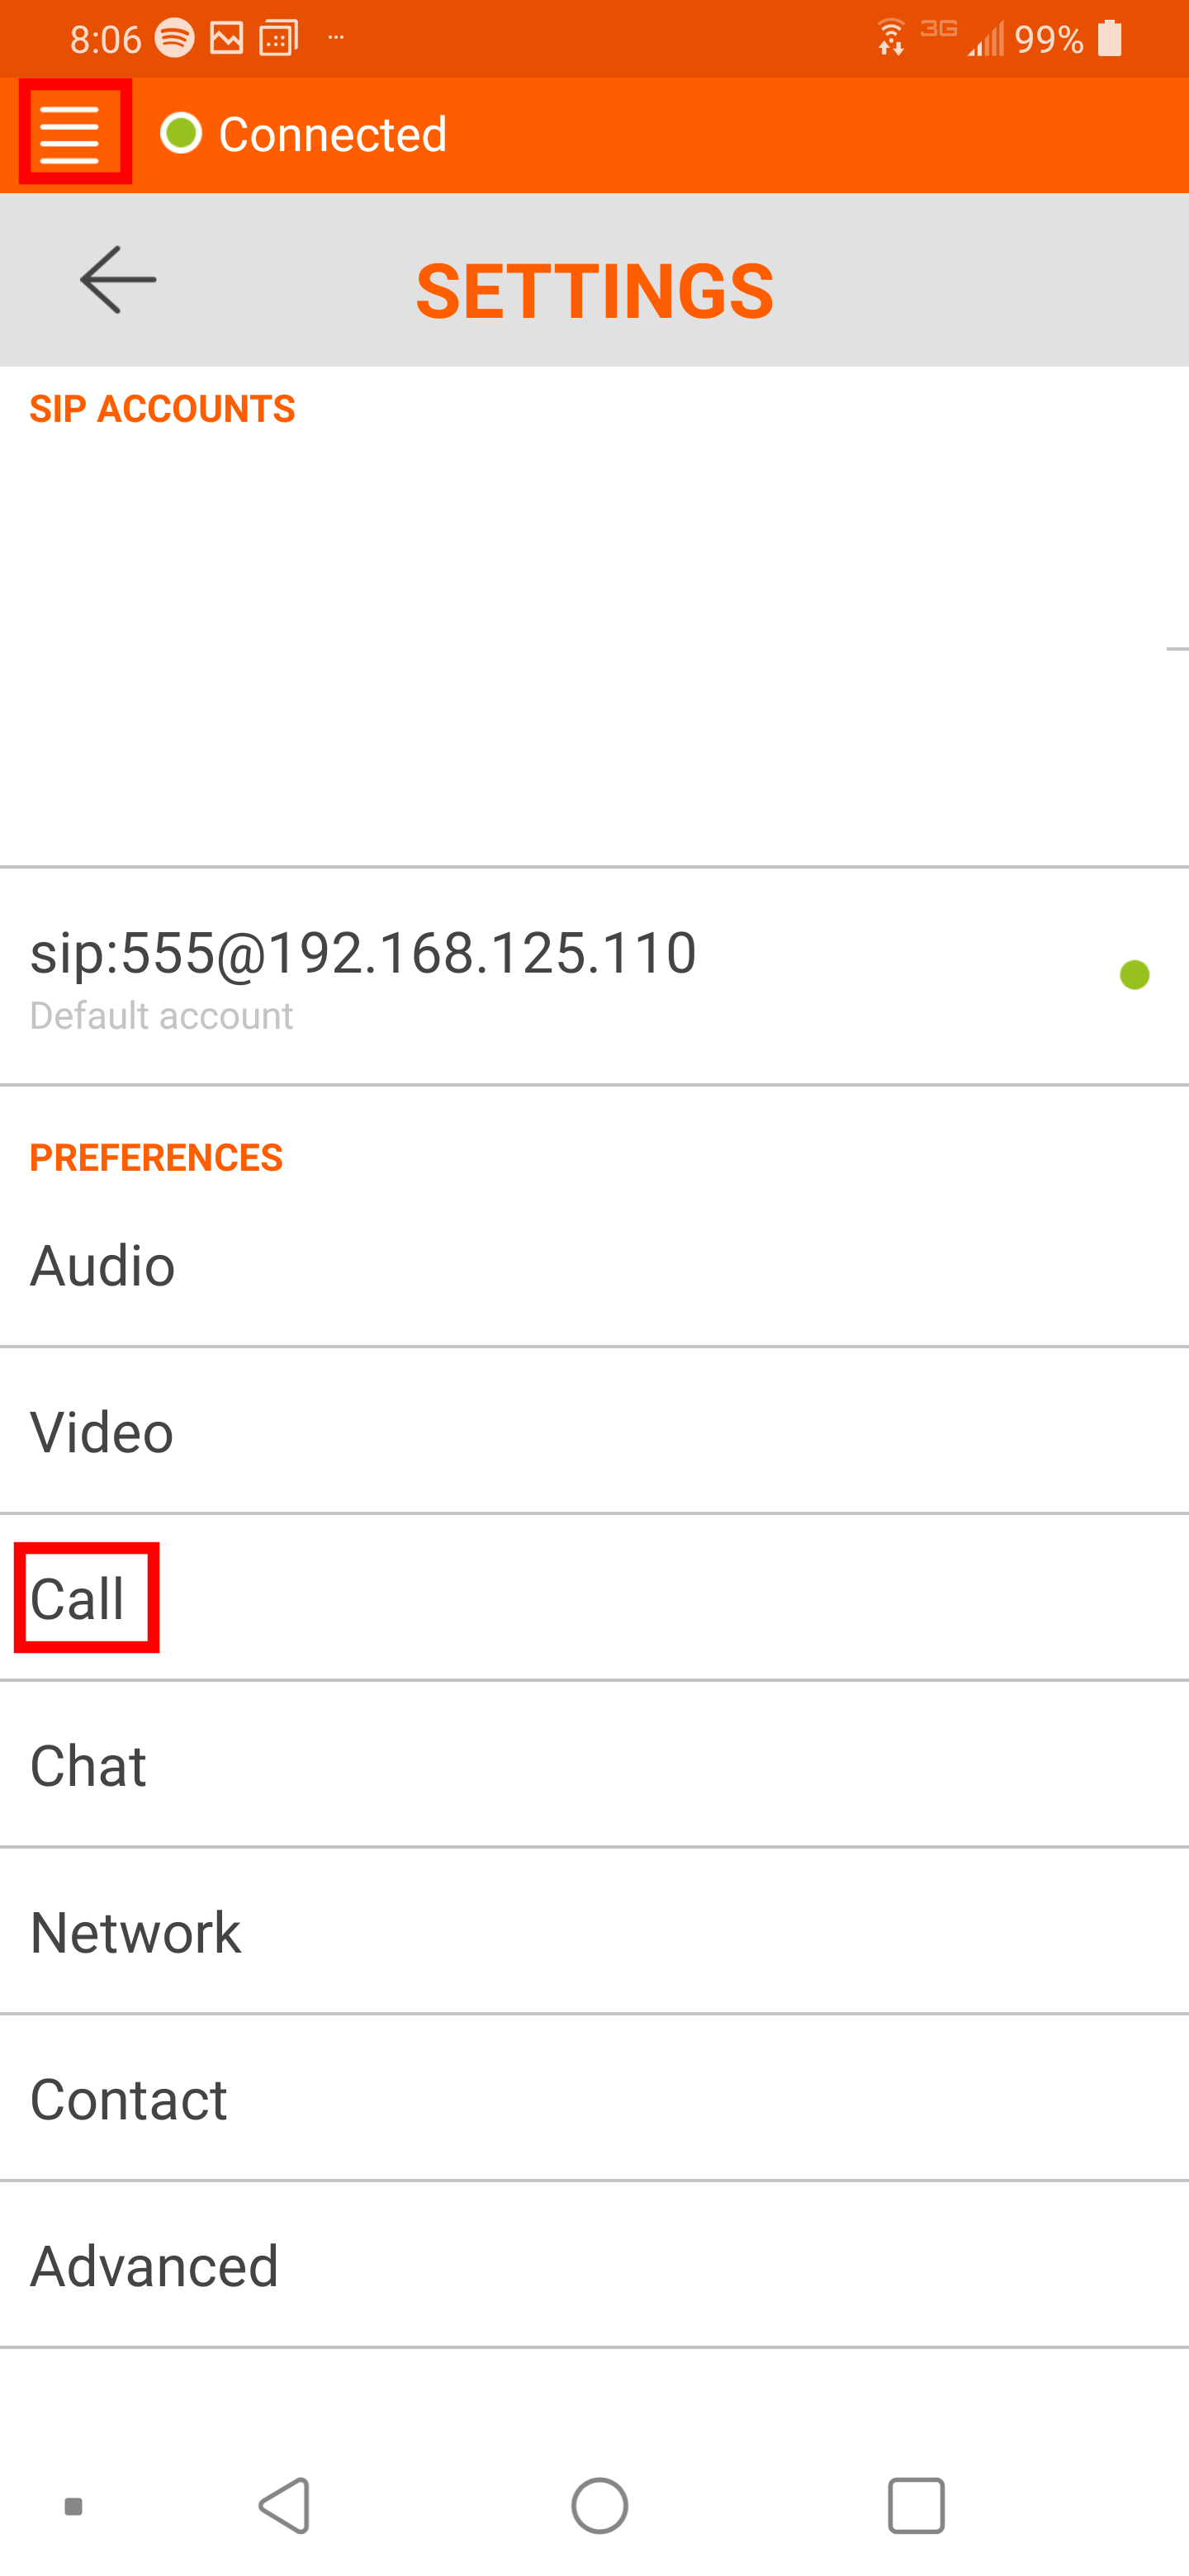
6) Click the top left corner 'Triple Bar' icon to open up the settings. Select 'Call' |
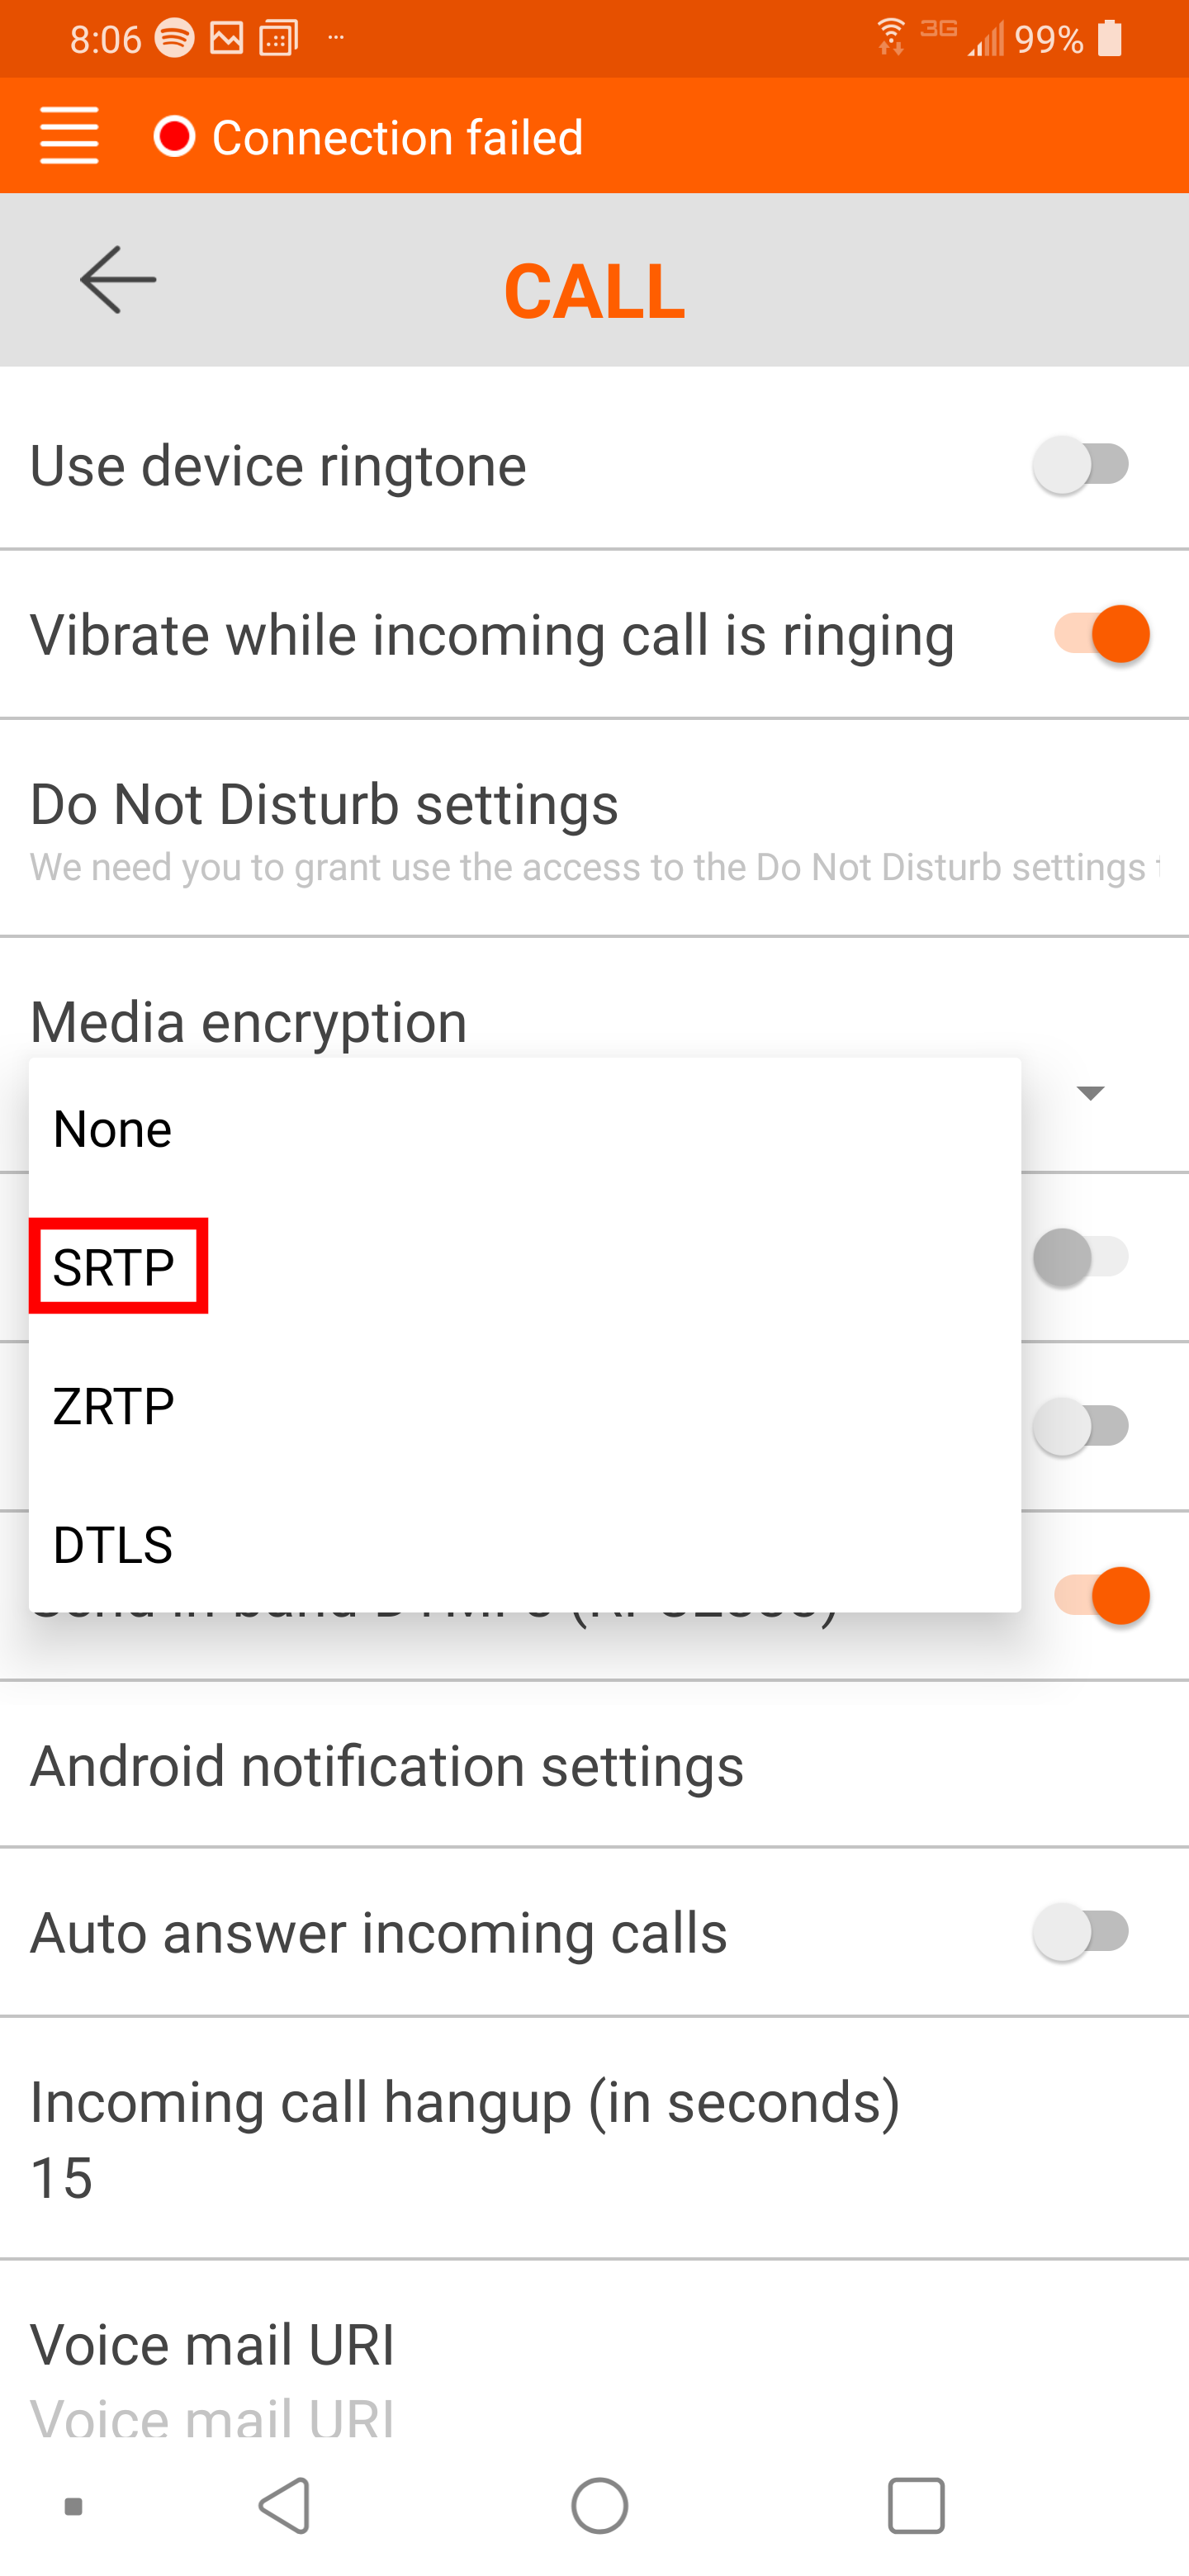
7) Select 'Media encryption'. Select 'SRTP' |
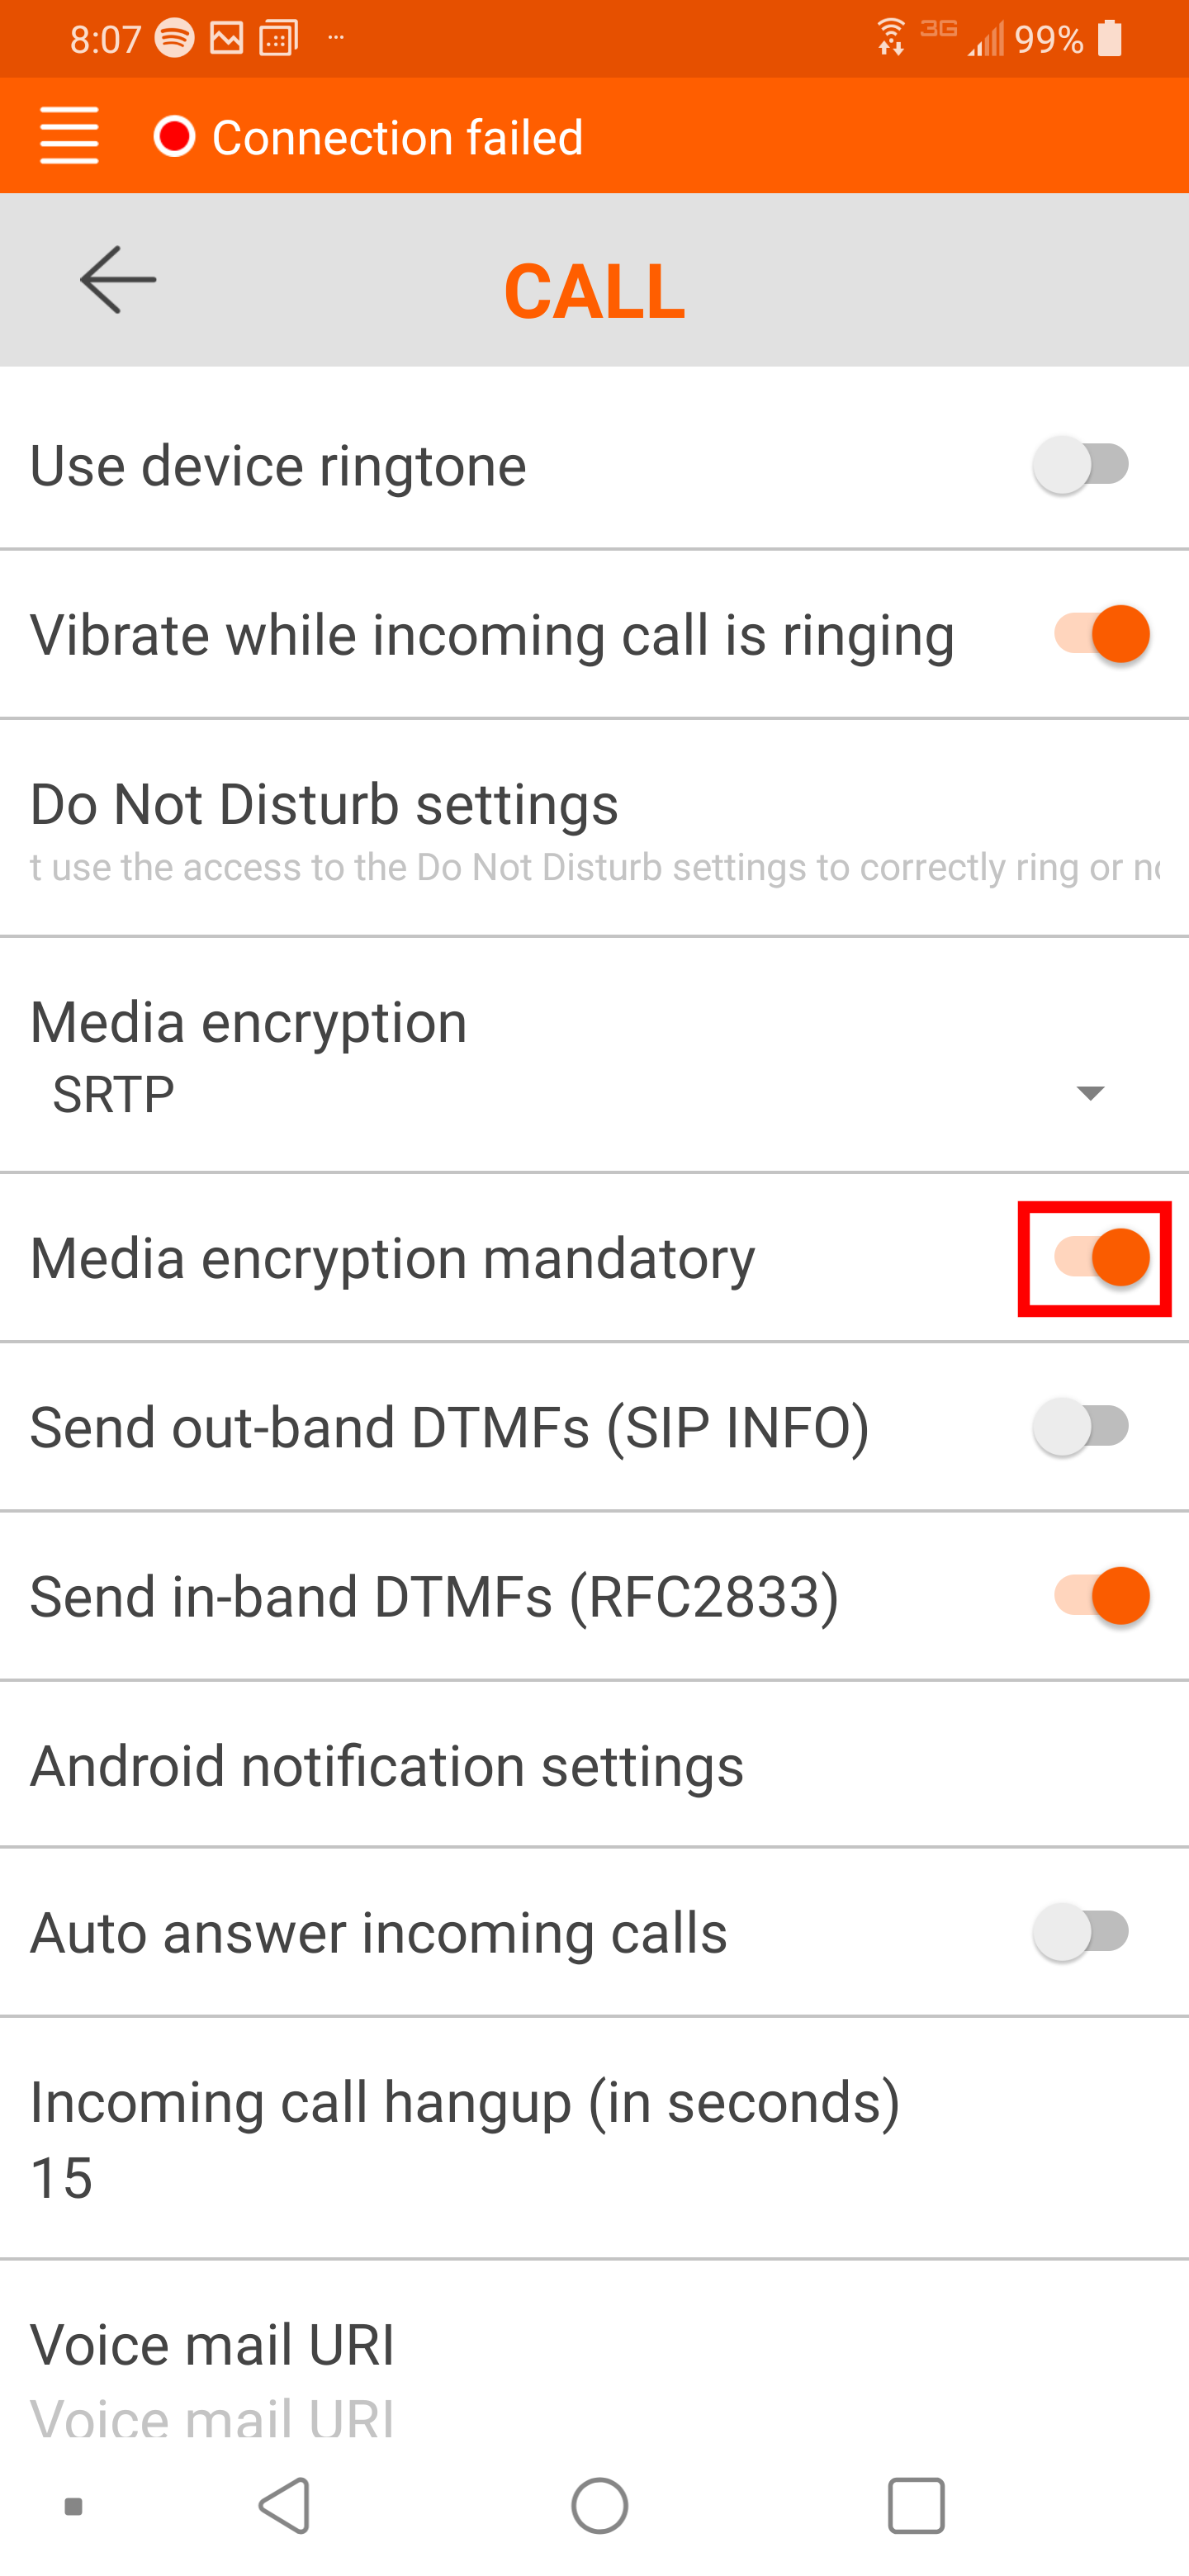
8) Enable 'Media encryption mandatory' |
|---|---|---|
|
|
|
|
Polycom 331/350 Cheatsheet
Overview
Within this space includes some of the most commonly used functions of the Polycom 331/350 SIP phone. Each of the tables represents a set of functions that will be available to you depending on your role within your organization as explained below:
- General Phone Functions - Applies to anyone who is using a Polycom 331/350 phone.
- Extended Agent Functions - Applies to those running a call center Intellasoft setup, these functions are specific to Agents. The General Phone Functions also apply.
- Extended Supervisor Functions - Applies to those running a call center Intellasoft setup, these functions are specific to those in a Supervisory role. The Extended Agent Functions and General Phone Functions also apply.
General Phone Functions
| Agent |
Instruction |
| Emergency | Dial 9 – 911 |
| Outside Calls - Local |
Dial 9 + (7) Digit Local Number |
| Outside Calls – Long Distance | Dial 9 + (10) Digit Long Distance Number |
| Call Hold Retrieval To Another Phone |
Phone One: Place Call on Hold Phone Two: Dial * + PhoneOneExtension where call is holding |
| Transfer Call |
|
|
Conference Call – Method 1 |
|
|
Conference Call – Method 2 |
|
| Conference Call – Split Calls |
|
|
Arrow Up |
|
Extended Agent Functions
| Agent |
Instruction |
| Agent Login |
|
| Agent Pause |
|
| Agent Logoff |
|
Extended Supervisor Functions
|
Agent |
Action |
|
Voicemail |
|
|
Voicemail (Access from other extension) |
|
|
Call Center Station Monitor |
Press the # key to switch to the next call (If the extension has multiple Lines with calls) Press 8 to whisper to the Agent Press 9 to barge into the call |
| Day / Night |
|
Polycom VVX Video Tutorials
Overview
This chapter is dedicated to training on the various features of the Polycom VVX 400. Above each video are step-by-step instructions that correspond with the videos, though in some cases they may be more detailed. The video player is controlled by buttons located at the bottom. Their functions are as follows: (1) Play/Pause, (2) Timeline Slider, (3) Volume Slider, (4) Fullscreen.
Table of Contents
- Dialing Options
- Direct Dial
- Speakerphone Dial
- Headset Dial
- Handset Dial
- Incoming Call Functions
- Answering
- Pre-answer Functions
- On Call Functions
- Active Call Functions
- Transferring
- Transferring to Voicemail
- Conference Call Method 1
- Conference Call Method 2
Dialing Options
Direct Dial
- To place a call enter the number you wish to dial. Alternatively, you can dial by pressing one of the favorited contacts from the Lines screen or by using the directory (Press Directory button > find contact > press Dial)
- Press Dial.
- Wait for the other party
Speakerphone Dial
- Press the Speakerphone button.
- Dial the number, press the Lines button to access your main contact, or press More followed by Directory to access the directory.
- Press send if the number was manually entered, or press dial once you have found the contact you wish to dial if using the directory.
Headset Dial
Handset Dial
- Pickup Handset.
- Dial the number, press the Lines button to access your favorited contacts, or press More followed by Directory to access the directory.
- Press send if the number was manually entered, or press dial once you have found the contact you wish to dial, if using the directory.
Incoming Call Functions
Answering
To Answer a Call:
- Pick up the Handset (to receive the call through the handset)
- Press the Answer button (this will answer the call through Speakerphone or Headset mode depending on what was most recently used)
- Press the Headset button (ensure you have a headset connected). The headset port is located on the back of the Polycom.
- If you press the headset button, it is important to remember that unless switch to a different method of placing/receiving calls future calls will be placed/answered through the headset
- This feature is known as Headset Memory, and can be enabled/disabled from Home > Settings > Preferences > Headset > Headset Memory.
Pre-answer functions
- Answer: Answer the call.
- Reject: Rejects the call and sends it to an unavailable destination. Depending on the organization's configuration, it may be a voicemail, or it may be another extension.
- Forward: Forward the call to another extension or even an external phone number.
- More: Access more options.
- Ignore: Ignores the call. The caller will continue to ring but the ringer will be silent. You still have the option to answer if the call does not expire per the ring interval.
- Lines: Place a call to another line as defined in your favorites, alternatively you can switch to a separate line associated with the Polycom and place a call. Keep in mind the incoming caller will continue to call unless answered.
- More: Returns to previous settings (Answer, Reject, Forward).
On Call Functions
Active Call Functions
- Hold: Places active caller on hold until the Resume button is pressed.
- End Call: Terminates the active call.
- Transfer: Option for transferring to another extension or phone number (explained in depth below).
- More: Accesses additional active call functions.
- Confrnc: Enter conference mode (explained in depth below).
- Lines: Place a call to another line as defined in your favorites, alternatively you are able to switch to a separate line associated with the Polycom and place a call. You can also use the function to initiate a conference call with the active caller (see below).
- SysDial: Allows you to enter a number to quickly dial a contact that has been assigned a short code. For more see Phone SysDial Directory.
- Press More again to return the previous set of functions (Hold, End Call, Transfer)
Transferring to Another Extension/Phone Number
- Place the active caller on Hold or press the Transfer button.
- Enter a number you wish to transfer to, or use the Directory, or favorited contacts from the Lines screen.
- Wait for the other party to pick up to announce the caller, other press Transfer to cold transfer.
- If the other party you are transferring to picks up and in unable to accept the call or you get a voicemail, press Cancel.
Transferring to an Extension's Voicemail
- Place the active caller on Hold or press the Transfer button.
- Dial ** then press Send button, immediately followed by Trnsfr
The transferring function is a custom Intellasoft function and is not one built into the Polycom itself, so using the directory or lines function will not work. You must know the extension number of the party you wish to transfer to
coming soon
Conference Call - Method 1
This method assumes you already have an active caller on the line.
- Press More followed by Confrnc button.
- Dial the number/extension you wish to start a conference with. You can also use favorited contacts from the Line's screen or the Directory.
- Once you are connected, press More then Confrnc again. You should now see that you are connected to two parties in conference mode.
Conference Call - Method 2
This method assumes you do not have any active callers on the line.
- Place a call on Line 1. You can wait for the other party to pick up, or can you go ahead and place another call on Line 2
- Once you have both parties connected press More then Join. You should now see that you are connected to two parties in conference mode.
Conference Call Management
- Press Manage to bring up the Conference Call Management Options.
- Use the directional pad to navigate between the members of the conference.
- Far Mute: Mutes the member so that the other members including yourself will not hear them during the conversation. Press the Unmute button so they may speak again. Note that the member will still be able to hear other members of the conversation.
- Hold: Puts the selected member on Hold, press resume to bring the member back from hold.
- Remove: Removes the member from the conference call.
If you have 3 members including yourself during a conference call and you remove a member, this will end the conference call but you will still be on the line with the member that was not removed.
- More: Accesses additional conference call functions.
- Info: Get info about selected members.
- Back: Exit Conference Call Management options.
Linphone Mobile - Users Guide
Overview
This guide will assume you already have Linphone 4.0 installed and can launch it successfully.
Making a Call
1) Start by tapping the box at the top of the application. We call this the 'Dial' box.
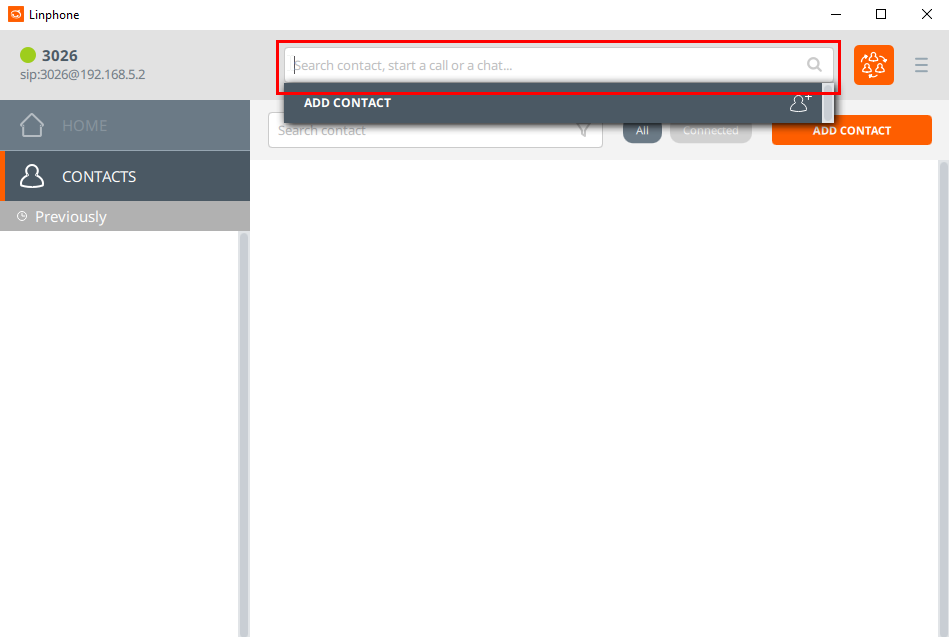
- Type the contact number you are calling.
- Or if you already have a contact in your list, tap the contact's name.
Finally: tap the call button located in the middle of the three button to start dialing.


Here is what a connected call looks like.

To end your call: Press the middle 'hangup' button at the bottom right corner.

Number-Pad


From here you can enter the number to be called.

Receiving a Call
When receiving a call you will see a notification at the bottom right hand side of the screen. Press the middle button to the accept the call.

Or click the right-most button to reject the call.
Conference Calls
Below are a couple examples for initiating a conference call.
While on a Call
If you are already on a call press the right hand button under the 'Calls' section.

From here you can select or type the contacts/numbers you are wanting to invite to join.
For Example: Co-worker at extension 5515 needs to join this call.

When done entering the number to be called, click 'start',
- The number dialed will now ring.
- Once the dialed party picks up, they will be on the call with you AND the original party that was on the line.
Starting a Conference Call
From scratch:
If there are no calls in progress, click the conference icon on the top right as shown here.

- Select contacts from the list or type in extensions/phone numbers to call.
- When done, click 'start',
- All parties who answer the call will be joined into the conference.

Transferring Calls
Currently the only option is a 'blind transfer'.
- When a transfer completes, the call will disconnect, and the original party will now be talking to whom it was transferred to
Start by clicking 'Triple Bar' button on the right hand side under 'Calls'.

- From here you can find the contact you wish them to transfer to.
- Or, enter the extension or phone number of the intended transfer
- Upon clicking the 'Transfer Arrow', your call will disconnect and will be sent to the new party.

Polycom 331/335/VVX Video Tutorials
Overview
This chapter is dedicated to training on the various features of the Polycom VVX 400. Above each video are step-by-step instructions that correspond with the videos, though in some cases they may be more detailed. The video player is controlled by buttons located at the bottom. Their functions are as follows: (1) Play/Pause, (2) Timeline Slider, (3) Volume Slider, (4) Fullscreen.
Table of Contents
- Dialing Options
- Direct Dial
- Speakerphone Dial
- Headset Dial
- Handset Dial
- Incoming Call Functions
- Answering
- Pre-answer Functions
- On Call Functions
- Active Call Functions
- Transferring
- Transferring to Voicemail
- Conference Call Method 1
- Conference Call Method 2
Dialing Options (331/335)
Direct Dial
- To place a call enter the number you wish to dial, alternatively search the directory for the contact you wish to dial (Press More > Directory > find contact > press Dial)
- Press Dial Button to start calling.
- Wait for other party.
Speakerphone Dial
- Press Speakerphone button.
- Dial number, or press More followed by Directory to access directory.
- Press Dial button to start calling.
Headset Dial
Handset Dial
- Pickup Handset.
- Dial number, or press More followed by Directory to access directory.
- Press Dial button to start calling.
Directory Access
Incoming Call Functions (331/350)
Answering
- Pick up the Handset (to receive the call through the handset)
- Press the Speakerphone button to receive the call through Speakerphone.
- Press the Answer button (this will answer the call through Speakerphone or Headset mode depending on what was most recently used)
- Press the Headset button (ensure you have a headset connected). The headset port is located on the back of the Polycom.
- If you press the headset button, it is important to remember that unless switch to a different method of placing/receiving calls future calls will be placed/answered through the headset
- This feature is known as Headset Memory, and can be enabled/disabled from Home > Settings > Preferences > Headset > Headset Memory.
Incoming Call Functions
- Answer: Answer the call.
- Reject: Rejects the call and sends it an unavailable destination, depending on the organizations configuring. May be a voicemail, or it may be another extension.
- Ignore: Ignores the call. The caller will continue to ring but the ringer will be silence, you still have the option to answer if the call does not expire per the ring interval.
On Call Functions (331/350)
Active Call Functions
- End Call: Terminates active call.
- Trnsfr: Option for transferring to another extension or phone number (explained in depth below).
- More: Accesses additional active call functions.
- Conf: Enter conference mode (explained in depth below).
- SysDial: Allows you to enter a number to quickly dial a contact that has been assigned a short code. For more see Phone SysDial Directory.
- Press More again to return the previous set of functions (Hold, End Call, Transfer).
Transferring to Another Extension/Phone Number
- Place active caller on Hold or press the Transfer button.
- From here you have 3 Options:
- Enter the extension/number you wish to transfer to.
- Normal transfer: this will keep the caller on your line while you attempt to reach the other party to announce the caller.
- Blind transfer: This will send the caller to the extension/number without keeping them on the line or having the ability to announce the caller to the party you are transferring to.
- If using normal/blind transfer you are able to enter the number/extension to transfer to or you can use the recent callers list as well the directory to find a contact to transfer to.
- If using option a to transfer, click transfer, other press the Dial button on the phone to finalize the transfer.
- If using option a or b, remain on the line until the other party picks up. Once they have picked up and you have announced the party, press the transfer button again to finalize the transfer.
Transferring to an Extension's Voicemail
Not sure if this is working. Coming soon.
Conference Call - Method 1
This method assumes you already have an active caller on the line.
- Dial the number/extension you wish to start a conference with, alternatively find the contact you wish to connect with from the Callers button or Directroy button (Dir).
- Once you are connected press Conf.
- You should now see a message stating Active: Conference, indicating you are now in conference mode.
- You may press the Split button to separate the conference members from each other, which will place them on hold on Line 1 and Line 2 respectively.
- If you need to restart the conference while the members are on hold, press More followed by Join.
Conference Call - Method 2
This method assumes you do not have any active callers on the line.
- Place a call on Line 1, and wait for the party to pick up. Once they pick up, place them on hold.
- Place a call on Line 2.
- Once you have both parties connected press More than Join. You should now see that you are connected to two parties in conference mode.
Troubleshooting
Polycom Admin Password
| Regular default Polycom password | 456 |
| Our version of the admin password |
|
| Admin menu for Polycom 330 |
|
| Accessing the Polycom web admin |
What is the standard way to access? Use the Admin / Polycom password |
Reset To Factory
| Menu Steps |
1. Go to Menu > Settings > Advanced 4. Reset To Defaults |
Phone not connecting / Not initializing / constantly rebooting
Plug the phone directly into the switch in the closet. If the phone boots up correctly, then this is an issue with any of the following:
| cable | Try replacing cable |
| jack | Possibly need to network-test the jack |
| switch config |
Not allowing the phone on the voice VLAN or having the wrong VLAN.
See custom notes on the system: /etc/network/interfaces Example to set to VLAN to our default of 50:
|
| check connected IPs |
|
Transfer Log aka Provisioning Log
| What | When a phone gets its configuration, it downloads it from the provisioning server. |
| Location |
/var/log/pure-ftpd/transfer.log |
| Any other locations on other systems? | |
| Search | IP or compressed lowercase MAC |
| Example |
grep 50.51 /var/log/pure-ftpd/transfer.log Can search for just the last two octets |
| Example |
grep 588d /var/log/pure-ftpd/transfer.log Can search for just the last few characters of a MAC |
| Tip | If a phone downloads sip.ld twice then it's probably doing a firmware update |
| Tip | The last thing the phone downloads is the ringtones, but only if there are ringtones to be downloaded |
|
|
CLI aka Command Line Interface
|
Finding the MAC / IP via Caller ID |
show extension status filter_by callerid_name like dave |
|
Finding the MAC / IP via Extension |
show extensions status filter_by extension like 239 |
| Other search terms |
phonegroup_name mac ip_address |
|
Switch to Configuring Extension from Polycom => reg 1 |
sip_extension |
|
Switch to Configuring Polycom from Extension |
polycom |
|
Take Out Override Provisioning Server |
polycom <mac> reg 1 no override_server |
| Idle Screen URL |
polycom <mac> idle_screen_url "https://65.51.69.82/pbx/polycom/PolycomIdleStatus.fcgi?exten=653" External HTTPS idle_screen_url "http://192.168.50.1/pbx/polycom/PolycomIdleStatus.fcgi?exten=653" Internal HTTP |
|
Setting or changing the extension of a polycom |
configure polycom <mac> reg 1 sip_extension <exten> |
| Getting rid of an extension |
Same as above except for the last line no sip_extension |
| Renaming an extension |
configure rename extension <existingExten> <newExten> |
| Switching the extension to a different phone |
First need to get rid of the extension (within the polycom config) just like above "no sip_extension" Then configure the new extension for the polycom just like above |
| Setting a DID |
configure extension <exten> did <10-digit-number> |
| Check Class Of Service for international dialing on an extension |
Configure the extension and then show. The cos is set to international extension 373 |
| If a phone is not hitting the provisioning server - especially for like-new or grade-b phones - could have harcoded provisioning programmed into the phone itself |
Get ip address from the menu on the polycom |
Polycom Directory Files
| What | Contact files for presence and monitoring extensions |
| Location |
/var/tftpboot-files/Contacts/<mac>-directory.xml Single tenant system /var/tftpboot-files/secure/Contacts/<mac>-directory.xml Multi-tenant hosted uses "secure" |
| Search |
find /var/tftpboot-files/ | grep <mac> |
| What | Site file - contains digit map |
| Location |
/var/tftpboot-files/site.cfg Single tenant system /var/tftpboot-files/secure/site.cfg Multi-tenant hosted uses "secure" |
| Hack way to force a reboot |
<digitmap dialplan.digitmap="***x.T|**x.T|*x.T|x.T|+x.T" dialplan.digitmap.timeOut="3|3|3|3|3"/> Add an extra "|3" to the timeOut Save asterisk -rvvv sip notify polycomReboot <device> Undo the extra |3 in the timeOut Save |
Apache Access Log
| What | |
| Location |
/var/log/apache2/secure-access.log |
| Tip |
Get Phones Script
| What | Search for phones |
| Location |
|
| Usage |
/apps/bin/getPhones.pl | grep <device> |
DHCP Log
| What | |
| Location |
/etc/dhcpd.conf |
| Search |
Daemon Log
| What | |
| Location |
/var/log/daemon.log |
|
Search |
Customer AEL
| What | |
| Location |
/etc/asterisk/ael/custom/customer.ael |
|
Usage |
asterisk -rvvv ael reload |
Packet Sniffing
| What | Debugging provisioning server |
| Tip | Search DHCP log for mac address to find the IP |
| Usage |
tcpdump -i eth1 host 192.168.50.226 -A -s0 |
|
Using external provisioning server and maybe should be local |
|
| Accidentally using HTTPS for provisioning |
|
Blocking Incoming Numbers
| What | If for example a fax machine keeps calling and you want to block it |
| File | /etc/asterisk/ael/custom/trunks_in.ael |
|
Example on BSSB-A |
|
Channel Tracing
| What | Figuring out what the heck happened to a call-detail style |
| File |
/var/log/asterisk/full /var/log/asterisk/full.1 /var/log/asterisk/full.2.gz and many more .gz files |
| Example |
[2017-09-05 14:51:29.716] VERBOSE[1477] chan_sip.c: [2017-09-05 14:51:29.716] == <SIP/317-0000130f> New Call (Type: SIP) From: Stann Gravesande <317> (Destination: 671@cos_kwi_internal+local+ld+intl,1) |
| Search |
|
| Secondary Search | Once the New Call is found, grab the channel <SIP/317-0000130f> |
| Tracing By Channel |
/apps/bin/asterisk_trace_call -c 'SIP/317-0000130f' -d 2017-09-05 That parses through the |
| Tracing By Call Log |
/apps/bin/asterisk_trace_call -l 3624783 That parses through a few |
/apps/bin/asterisk_trace_call -lc | grep 7175588105
List all calls and then grep for a certain phone number
https://i.thinq.com => Origination (inbound calls to our call center - rounting into a phone number)
=> Uncompleted
ANI - Prefix with a 1 to a 10 digit number
Updating Polycom Firmware
| Still TODO |
|
so with the provisioning server there's a few things to do in /var/tftpboot-files i already uploaded the 5.6 firmware so, i make a backup directory with the current firmware i do like sip-5.4 or whatever the old one is if you cat sip.ver it'll tell you the current version i copy sip.cfg and sip.ver into the backup path and *.sip.ld as well and then i mkdir sip-5.6 cd sip-5.6 unzip ../Polycom-UC…etc.etc5-6.zip and then copy the sip.ver .. and then cp Configs/sip-interop.cfg ../sip.cfg and then cp *.ld .. and then once you have everything in /var/tftpboot-files then you need to copy all those to public and secure as well sip.cfg, sip.ver, and *.sip.ld |
Adding Permission To A Mailbox For Office 365
|
https://portal.office.com/adminportal/home#/homepage Users => active users => select user => mail settings => mailbox permissions => edit Then can Add which displays the users and can search for "Global Administrator" |
|
Right click "Global Administrator" name and then click "Add Shared Folder" Type in the name to search for and add it It takes quite a while for the new permissions to take effect |
Setting up a "Like New" Phone
|
Always check on the "Provisioning Server" configuration section of the phone. Phones of this type were often configured to be provisioned somewhere else, and need to have:
|
|---|